


C3472M-C (9/10) 13
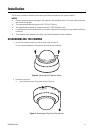
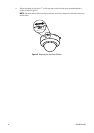
MOUNTING THE CAMERA
The mounting requirements are shown as follows:
*Make sure that the installed mount bracket can support more than five times the weight of the camera.
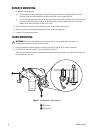
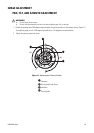
USING A 2-GANG JUNCTION BOX
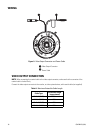
1. Install the 2-gang junction box (not supplied) onto the wall/ceiling.
a. When using a 2-gang junction box (4 x 4 inches), procure one locally that meets the dimensions in
Figure 6.
b. Locally procure four camera mounting screws suitable for the installation surface and structure of the
wall/ceiling or 2-gang junction box.
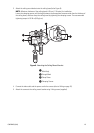
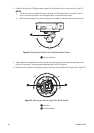
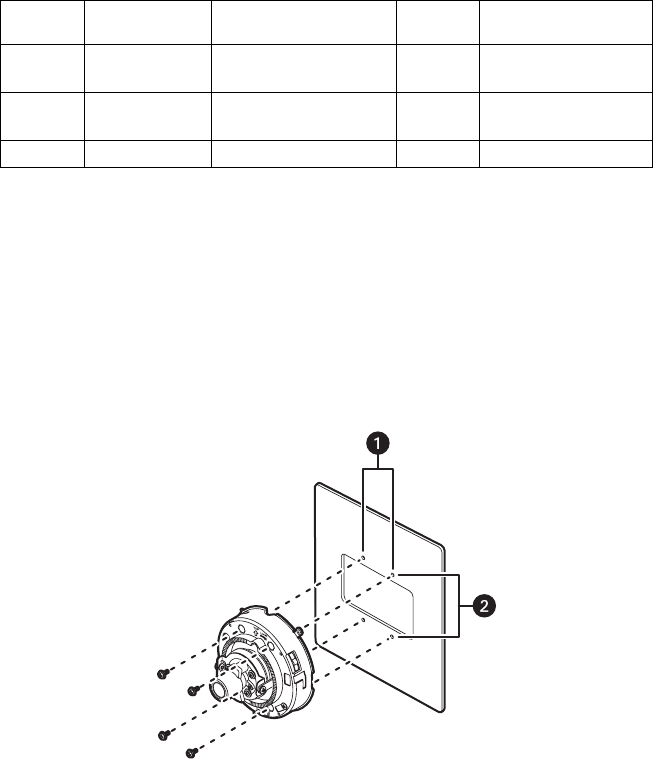
2. Mount the camera onto the 2-gang junction box with four screws (not supplied).
3. Fasten all of the mounting screws (refer to Figure 6).
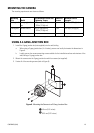
Figure 6. Mounting the Camera to a 2-Gang Junction Box
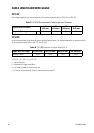
Mounting
Site Model
Recommended Screw and
Tightening Torque
Number of
Screws
Minimum Pullout
Strength
Ceiling/wall
Two-gang junction
box
M4 (or appropriate),
1.6 N·m (16 kgf·cm)
4 pcs. 196 N/pc.(20 kgf/pc.)
Ceiling/wall
Surface mount M4 (or appropriate),
1.6 N·m (16 kgf·cm)
4 pcs. 196 N/pc.(20 kgf/pc.)
Ceiling
Flush mount – – *
ì
46 mm (1.81 inches)
î
83.5 mm (3.27 inches)