37
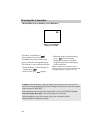
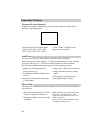
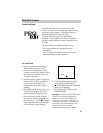
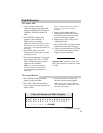
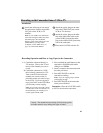
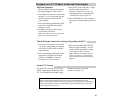
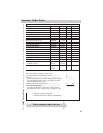
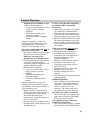
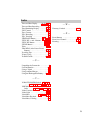
A B C D E F G H I J K L M N O P Q R S
T U V W X Y Z 0 1 2 3 4 5 6 7 8 9 ? Õ
. / , Ð ; : < > ! (BLANK)
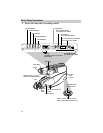
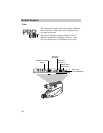
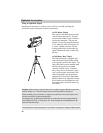
ProEdit Features
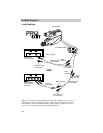
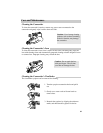
To Create a Title
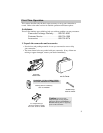
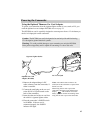
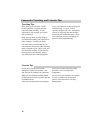
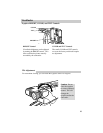
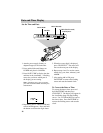
1. Attach a power source to the
camcorder, press and hold the small
button on POWER while sliding it to
CAMERA. POWER indicator will
light.
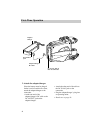
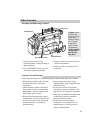
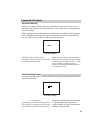
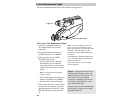
2. Press TITLER to display titler
graphics in the viewfinder. A
flashing cursor will appear.
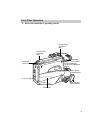
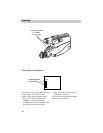
Note: Press TITLE SEL (select) to select
the other title page. Each time you press
TITLE SEL, it will switch between the two
title pages.
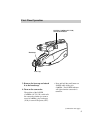
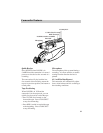
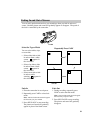
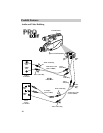
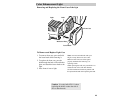
3. Press EDIT–ADV to move the
flashing cursor to the place you want
to begin your title.
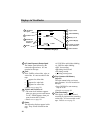
4. Select the first character for your title
by pressing TITLE SEL + or TITLE
SEL – until the character you want
appears in the viewfinder.
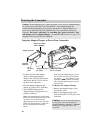
Notes: You can scroll through the
character register at a faster pace by
pressing and holding TITLE SEL + or
TITLE SEL –.
See the “Chart of Characters in Titler’s
Register” below for the characters
available.
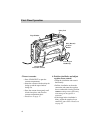
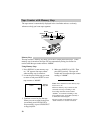
5. After you have selected the first
character, press EDIT–ADV to move
the flashing cursor where you want
your next character to appear.
6. Repeat steps 4 and 5 until you have
completed the title.
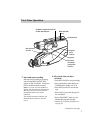
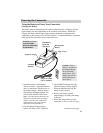
7. Press TITLE SEL if you wish to create
another title on the other title page.
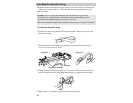
8. When you are finished, press TITLER
to store the title and remove the title
display from the viewfinder.
Important Note: Remember to remove the
titler graphics from the viewfinder for normal
recording.
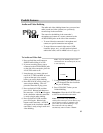
To Correct an Error
(continued on next page)
Chart of Characters in Titler’s Register
1. Press TITLER to display the titler
graphics in the viewfinder.
2. Press EDIT–ADV until the flashing
cursor is placed over the character you
wish to correct.
3. Press TITLE SEL + or TITLE SEL –
until the correct character appears.
Note: If you want to delete a character,
press TITLE SEL + or TITLE SEL – until
the blank space appears.