


EN
EN
15
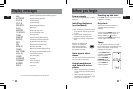
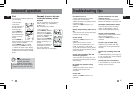
Troubleshooting tips
Unit doesn’t turn on
• Check that batteries are properly
inserted and not exhausted.
• Make sure battery compartment door
is properly closed.
• Make sure LOCK function is not
activated.
Display keeps flashing when unit is
off
• You may not have set the time. Refer
to section on Time Setting.
Cannot record
• Make sure LOCK function is not
activated.
• Make sure memory is not full.
• You have recorded 99 files in one
folder. Try record in a new folder.
• If you select external memory, please
ensure that an external memory card is
properly inserted.
Cannot show recording date and
time during playback
• You may have not set the date and
time before recording. Refer to section
‘Time Setting’.
No sound from speaker during
playback
• Make sure volume is not set to 0.
• Headphones should not be
connected.
Cannot edit
• Make sure LOCK function is not
activated.
Cannot activate the unit after
pressing on keys
• There may be software problems.
Remove the batteries to reset the unit.
Recordable time
becomes shorter
• You may have set the recording
quality to ‘High Quality’, refer to
section ‘Setting Recording Quality’.
Cannot perform playback
• Make sure you have selected folder
with recorded messages.
• Make sure LOCK function is not
activated.
Cannot erase recorded file(s)
• Make sure you follow each step
under section “Erasing Selected File”
carefully.
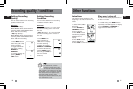
Cannot stop recording when AVR
ON
• If AVR ON sensitivity is too high (e.g.
8 - 10), recording may not be stopped
in noisy environment.
Cannot keep the saved setting
• If the batteries are removed, saved
settings may be removed.
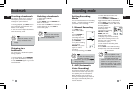
Format (Caution! All data
inside the memory will be
erased)
You can format the internal memory
when needed. (e.g. compatability
problem, etc.)
The procedures are as follow:
1. Turn on the unit.
2. Press ERASE, “DELETE”
will flash on the display.
3. Press and hold REC for
3 seconds, “FORMAT” will
flash on the display.
4. Press and hold ERASE,
“WAIT” will show on the
display, formatting is in
process.
6. After the formatting is
completed, the remain
time of the selected
memory will show on the display.
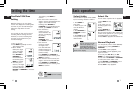
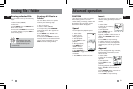
Advanced operation
14
Cut
You can erase unwanted parts from
your recording.
1. Select folder.
2. Select file.
3. Start playback of
the file with the
unwanted part.
4. Press ERASE to
mark the start of
the unwanted part,
“CUT-S” shows on
display.
5. Press ERASE to
mark the endof the unwanted part,
“CUT-E” shows on display.
6. Press ERASE again to confirm
cutting (or press STOP to cancel)
7. “WAIT” will show on the display.
8. After the memory rearrangement
completed, the unit will go to STOP
mode.
Tip:Tip:
Tip:Tip:
Tip:
Cutting, inserting new
segments and adding
appendix will only update
the recorded time length, without
changing recording time and date.
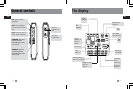
SP
AM
A
SP
AM
A
SP
ONE
DICT
MM
DD
A
SP
ONE
DICT
MM
DD
A