21
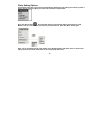
Exposure: This setting controls the brightness of the image. Press the Menu button and select
“Exposure”. The EV menu will appear. Use the ▲/▼ buttons to select an EV value. Select a positive
value to increase the brightness of photos, or a negative value to make photos darker. Press the Menu
button to exit the EV menu.
White Balance: This setting allows you to select the light conditions under which you are taking your
photos. Press the Menu button and select “White Balance”. ,Use the ▲/▼ buttons to choose outdoors,.
Shade, Light Bulb, Fluorescent. . After you finish making your selection, press the Menu button again.
Sharpness : Press the Menu button and select “Sharpness”. Use the ▲/▼ buttons to select Standard,
Sharp, Soft.. After you finish making your selection, press and hold the menu button to turn off the drop
down menu.
Exit: Choose EXIT to return to the Normal mode without making any changes.
Starting Your Camera
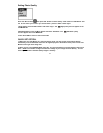
Press and hold the “Power” button for 3 seconds to start the camera. The LCD Monitor will light up
and the camera will make a” Beep” sound. This will confirm that your camera on and ready to use. The
Camera will be in the Normal photo taking mode.
LCD Monitor Display Options In Normal Mode
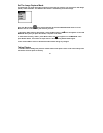
Press the Display button in the NORMAL mode to select the following options.
1.Icon Mode: LCD Monitor is on and all the icons are showing.
2.No Icons Mode: LCD Monitor is on but none of the icons are showing.
3. LCD Off Mode: The LCD is off completely. You can still take photos using the viewfinder. User this
mode to save battery or when bright sunshine makes it difficult to view the image in the LCD Monitor


