


46
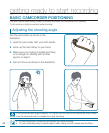
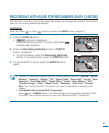
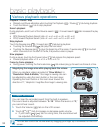
1. Select a subject to record.
• Adjust the LCD panel to the best angle for recording.
• Use the
Zoom lever or Zoom button to adjust the
size of the subject.
page 20
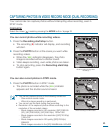
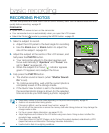
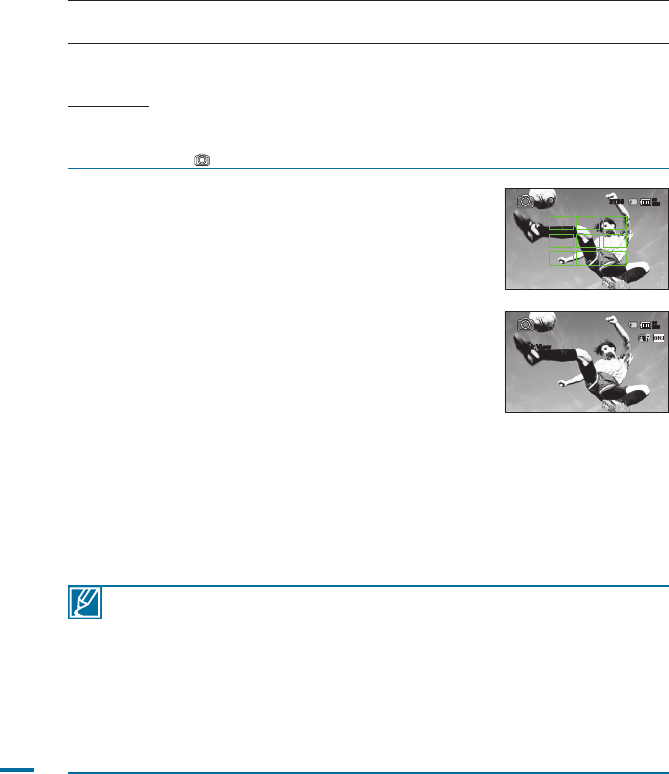
2. Adjust the subject at the centre of the LCD screen, and
half-press the PHOTO button.
• Your camcorder adjusts to the ideal aperture and
focus automatically (if “Aperture” and “Focus” are
set to “Auto”
pages 68, 73)
• When the subject is in focus, (
) indicator appears
green. If it appears red, readjust the focus.
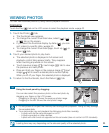
3. Fully press the PHOTO button.
• The shutter sound is heard. (when “
Shutter Sound:
On” is set).
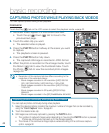
• To continue recording, wait until the current photo is
completely saved on the storage media.
• If the Quick View function is set to the desired time,
the recorded photo image is shown for the selected
time as soon as you finish taking a photo.
page 87
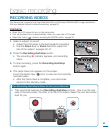
RECORDING PHOTOS
You can take photos and store them in an SD/SDHC memory card. Set the desired resolution and
quality before recording.
page 62
PRECHECK!
• Open the LCD screen to turn on the camcorder.
• Your camcorder turns on automatically when you open the LCD screen.
• Select the Photo (
) mode by pressing the MODE button.
page 33
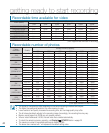
• Recordable number of photos varies depending on the photo size and quality.
page 40
• Audio is not recorded when taking photos.
• If focusing is difficult, use the manual focus function.
page 73
• Do not turn off the camcorder or remove the memory card when taking photos as it may damage the
storage media or data.
• For the on-screen display information, see pages 22~25.
• Adjust brightness and contrast of the LCD screen using menu items. Doing so does not affect the
recorded image.
page 96
• Photo files conform to the DCF (Design rule for Camera File system) standard, established by JEITA
(Japan Electronics and Information Technology Industries Association.)
• Use the built-in flash in low lighting conditions.
basic recording
90
MIN
Quick View
3785
90
MIN