


42_ DVR setup
DVR setup
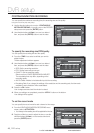
DVR Connection
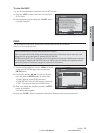
Use the direction buttons to move to the upper <NETWORK> icon in the SYSTEM SETUP menu screen
and press the [ENTER] button.
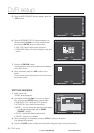
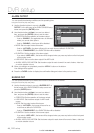
The IP SETUP screen appears.
Deselect the <DHCP> checkbox.
Locate the local PC in connection with the same router and check information of gateway, subnet mask
1st DNS and 2nd DNS server.
Provide the IP address, gateway, subnet mask 1st DNS, 2nd DNS server as appropriate.
If the DHCP server has the start address (192.168.0.100) and the end one (192.168.0.200) specified, change each of
them to one between “192.168.0.2~ 192.168.0.99” and “192.168.0.201 ~ 192.168.0.254”.
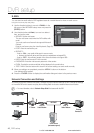
Router Port Forwarding
To access the PC or DVR in the local LAN area of the router, set the port forwarding for the router.
The DVR will use <RTSP SERVICE PORT> and <WEB SERVER PORT> for this purpose. You must set the
port forwarding for both ports.
For more information, refer to “Network Setup Guide” that comes with the DVR.
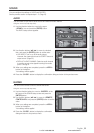
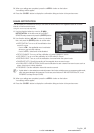
To check the connection status
Provide the IP address for the local PC or remote PC.
When the login dialog appears and prompts you to enter the ID and password, this means you have set
the connection properly.
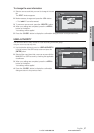
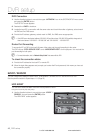
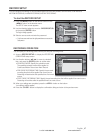
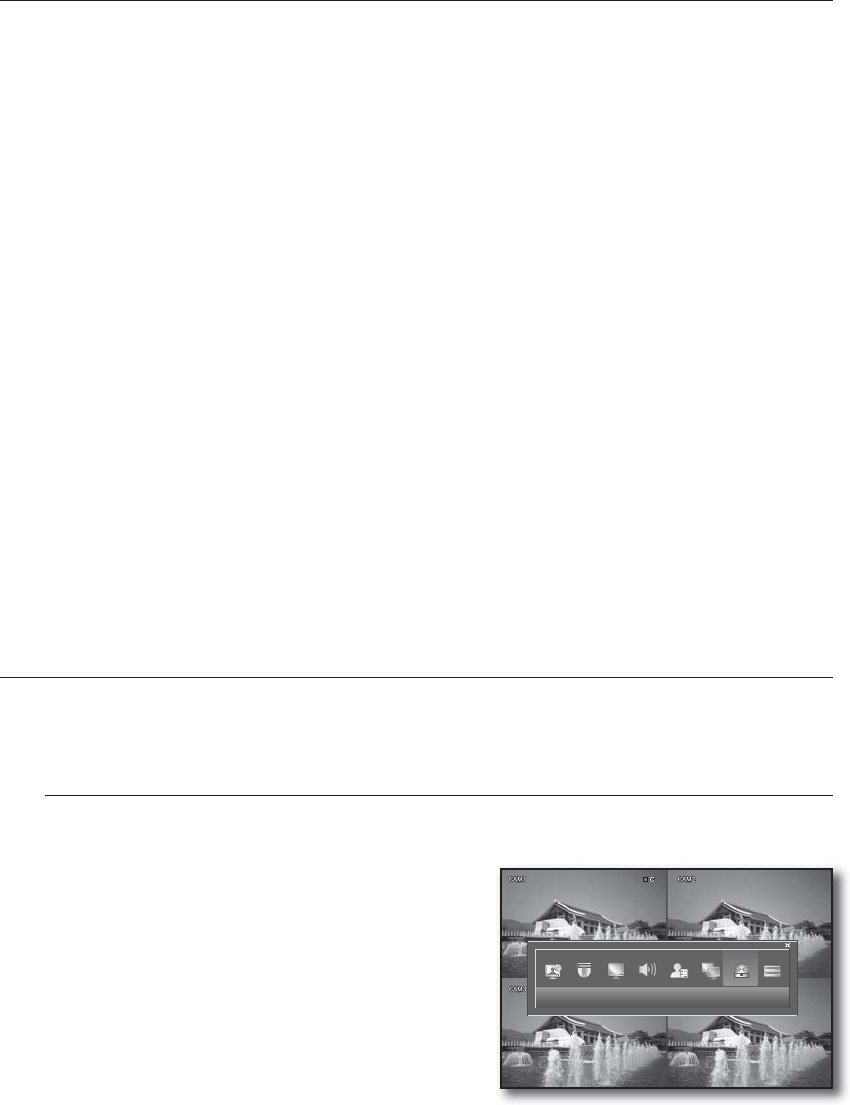
EVENT / SENSOR
You can configure the settings of HDD EVENT, ALARM INPUT, ALARM OUTPUT and BUZZER OUTPUT.
See the previous section to repeat steps 1~3. (Page 25)
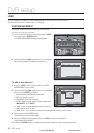
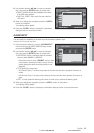
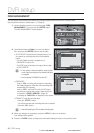
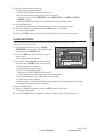
HDD EVENT
You can set to sound the alarm if the HDD has a problem or is full.
Using the mouse may help easy setup.
Use the direction buttons to move to the upper <EVENT /
SENSOR> icon and press the [ENTER] button.
The HDD EVENT screen appears.
1.
2.
3.
4.
M
M
1.
2.
1.
EVENT / SENSOR
Lo-Call 1890 866 900
www.cctvireland.ie