MOUNTING THE LENS
Please use a DC type auto-iris lens (sold separately).
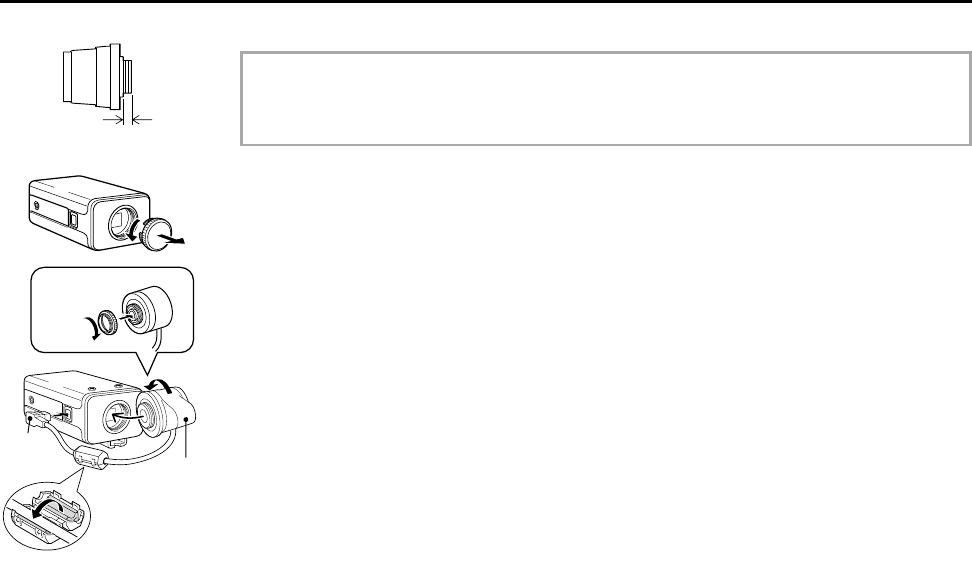
Checking the lens mount
Do not use a lens if length “L” is more than 7 mm. If not, that may damage the camera and prevent
proper installation.
1 Remove the lens mount cap from the camera.
2 Install the auto-iris lens.
CS mount type lens
Carefully align the lens mount with the camera opening, then turn the lens slowly to install it.
C mount type lens
To allow for flange-back adjustment, install the supplied C-mount adaptor on the lens mount, then
carefully align the lens mount with the camera opening and turn the lens slowly to install it.
3 Connect the lens plug to the lens iris output connector (LENS) on the side of the camera.
When using lenses from other makers, the plug shape may not correspond to the terminal on the camera.
In such a case, remove the original plug and using a soldering iron, connect the supplied lens iris plug
according to the diagram. (Refer to page 7.)
CAUTION:
When using an auto-iris lens, the supplied clamping core (B) must be installed on the lens wire, in order to
prevent electromagnetic interference to the other devices connected.
L
C mount type lens
1
2
2
3
CS mount
type lens
L72H2/XE2 GB 1999, 3, 2
6 English


