


How to set-up the Waterproof Housing >>
73
HOW TO SET-UP THE WATERPROOF
HOUSING
Set up camera
1. Insert fully charged lithium battery into camera.
2. Clean camera lens with dry, clean cotton swab.
3. Remove camera strap since this will prevent the camera from correctly
seating itself inside the housing.
4. Use the Easy Set-Up, located in the Capture menu, to guide you through
the correct land or underwater camera settings. See page 25 for more
information.
5. You can also manually set camera to Sea or Snorkel mode (when not using
External Flash accessory) or External Flash mode (If using External Flash
accessory). See page 31 for detailed instructions on how to set camera
to Sea, Snorkel or External Flash modes.
Set up housing
Opening and loading of the housing should be done in a dry environment such as in an
air-conditioned room to prevent trapping moist air in the housing which can cause the
housing to fog while underwater.
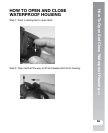
1. Open the housing by pushing in small locking tab and lift latch up. Do
not extend housing lid beyond its stop point or damage may occur to the
hinge area.
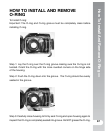
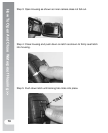
2. Carefully inspect O-ring for damage and make sure O-ring is firmly seated
in its groove. If O-ring is damaged and requires replacement, contact your
local authorized SeaLife dealer.
3. Clean the housing glass lens port using clean, dry cotton cloth. It is
recommended to apply anti-fog solution to the inside surface of the housing
lens port.
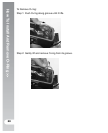
4. Carefully insert camera into housing. Make sure camera is clean and dry.
5. Insert one Moisture Muncher anti-fog (item #SL911) desicant capsules into
special slot inside housing. As the desiccant absorbs moist air, it turns
from blue to light pink. Replace desiccant capsule when color changes to
light pink.