


16
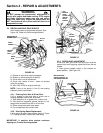
Section 4 - REPAIR & ADJUSTMENTS
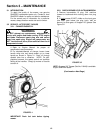
WARNING
DO NOT attempt any maintenance, adjustments or
service with engine and blade running. STOP engine
and blade. Disconnect spark plug wire and secure
away from spark plug. Engine and components are
HOT. Avoid serious burns, allow sufficient time for all
components to cool.
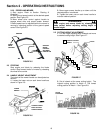
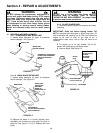
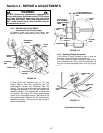
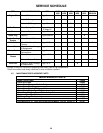
4.3 DRIVEN AND DRIVE DISC SERVICE
If the mower does not propel itself properly, See
Figure 4.6. Check for the following problems:
FIGURE 4.6
1. Grease on drive disc causing slippage.
2. Broken or disconnected drive spring.
3. Driven disc is out of adjustment.
4. Driven disc rubber is worn - does not contact
drive disc properly.
5. Worn Poly-V Belt or engine drive belt.
NOTE: If any of the above (1 thru 5) are causing
problems, service as follows:
4.3.1. Cleaning Drive Disc & Driven Disc.
If oil or grease on the drive disc or driven disc is
causing slippage, clean discs as follows:
1. Wipe away any oil or grease with a clean cloth.
2. Use either an approved grease solvent or hot,
soapy water to clean drive disc or driven disc.
3. Rinse components with clean water.
4. Dry components with a clean cloth.
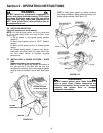
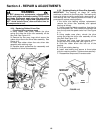
4.3.2. Drive Spring Repair/Replacement
If drive spring is loose, reconnect as shown in Figure
4.7. If spring is broken, replace with new spring.
IMPORTANT: If machine drive system continues
slipping see Trouble Shooting section.
FIGURE 4.7
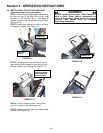
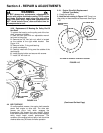
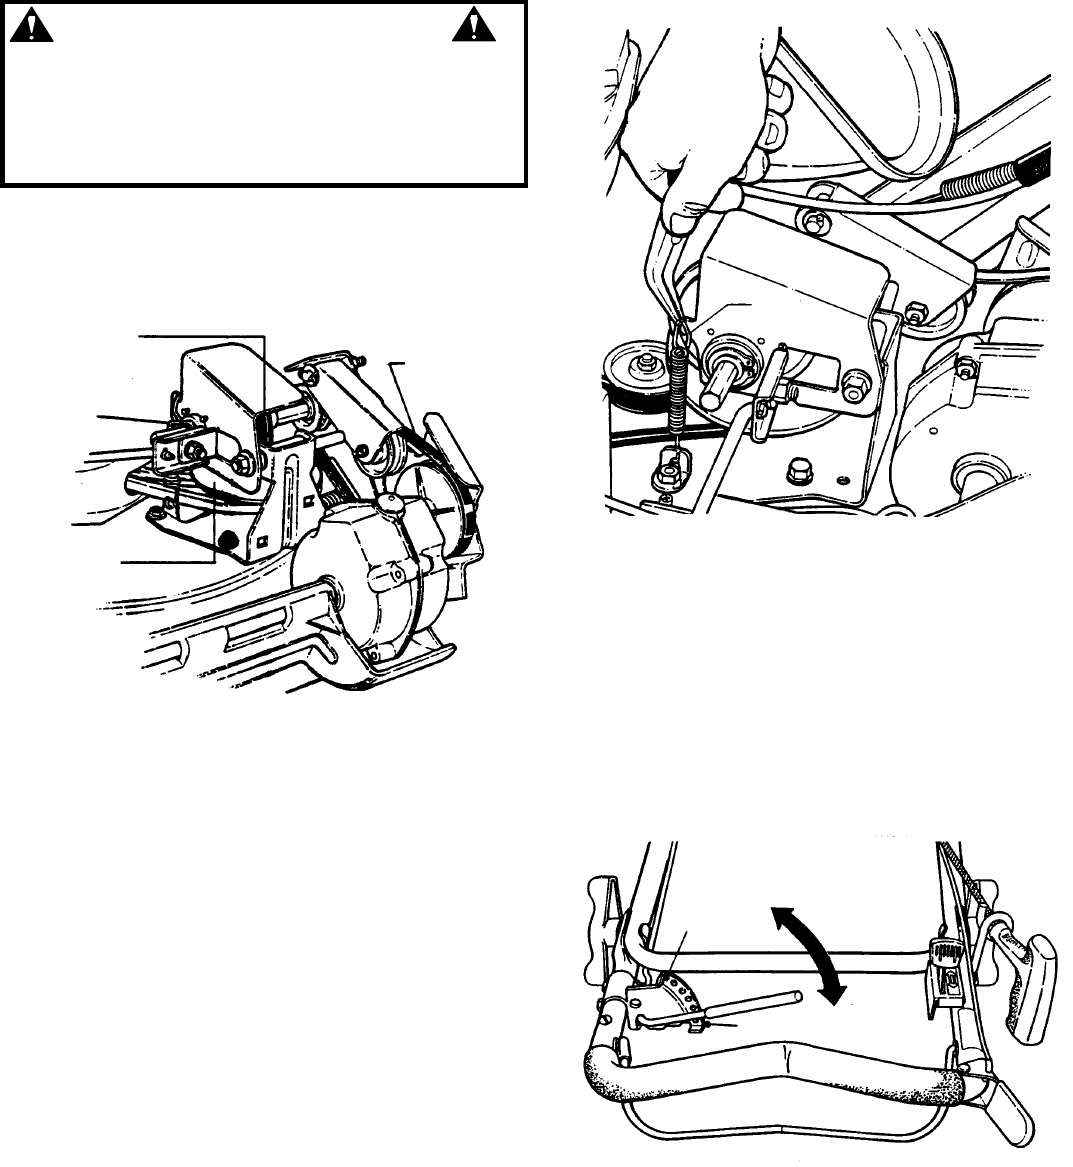
4.3.3. DRIVEN DISC ADJUSTMENT
If the drive disc and driven disc are clean and the
mower drive is still slipping, adjust the driven disc as
follows:
1. Place ground speed control in the number six
speed position. See Figure 4.8.
FIGURE 4.8
USE
NEEDLE
NOSE
PLIERS TO
INSTALL
DRIVE
SPRING
DRIVE
SPRING
DRIVEN DISC &
RUBBER RING
POLY-V
BELT
DRIVE
SPRING
ENGINE
DRIVE
BELT
DRIVE
DISC
MOVE GROUND
SPEED CONTROL TO
SIX-SPEED POSITION
SIXTH SPEED
POSITION
SIXTH
FIRST
FIRST SPEED
POSITION