Administrating the Camera
Configuring the System — System Menu
36
NTP server 3: Enter the third choice for NTP server
address.
DHCP server: Select DHCP server when you need to
get NTP server information from DHCP server.
Multicast: Select Multicast when you search for an
NTP server with Multicast.
Time zone
Set the time difference from Greenwich Mean Time in
the area where the camera is installed.
Select the time zone in the area where the camera is
installed from the drop-down list.
For Japan, select “Osaka, Sapporo, Tokyo
(GMT+9:00)”
Automatically adjust the clock for daylight
saving time changes
When selected, the clock is automatically adjusted
according to the daylight saving time of the selected
time zone.
Note
If the time zone selected in Time zone is different from
that set on the computer, the time is adjusted using the
time zone difference and set on the camera.
OK/Cancel
See “Buttons common to every menu” on page 32.
Superimpose Tab
Select whether to superimpose the camera ID, date &
time and other information on the image or not.
The camera ID is also superimposed on images recorded
by the Pre-alarm or Post-alarm function.
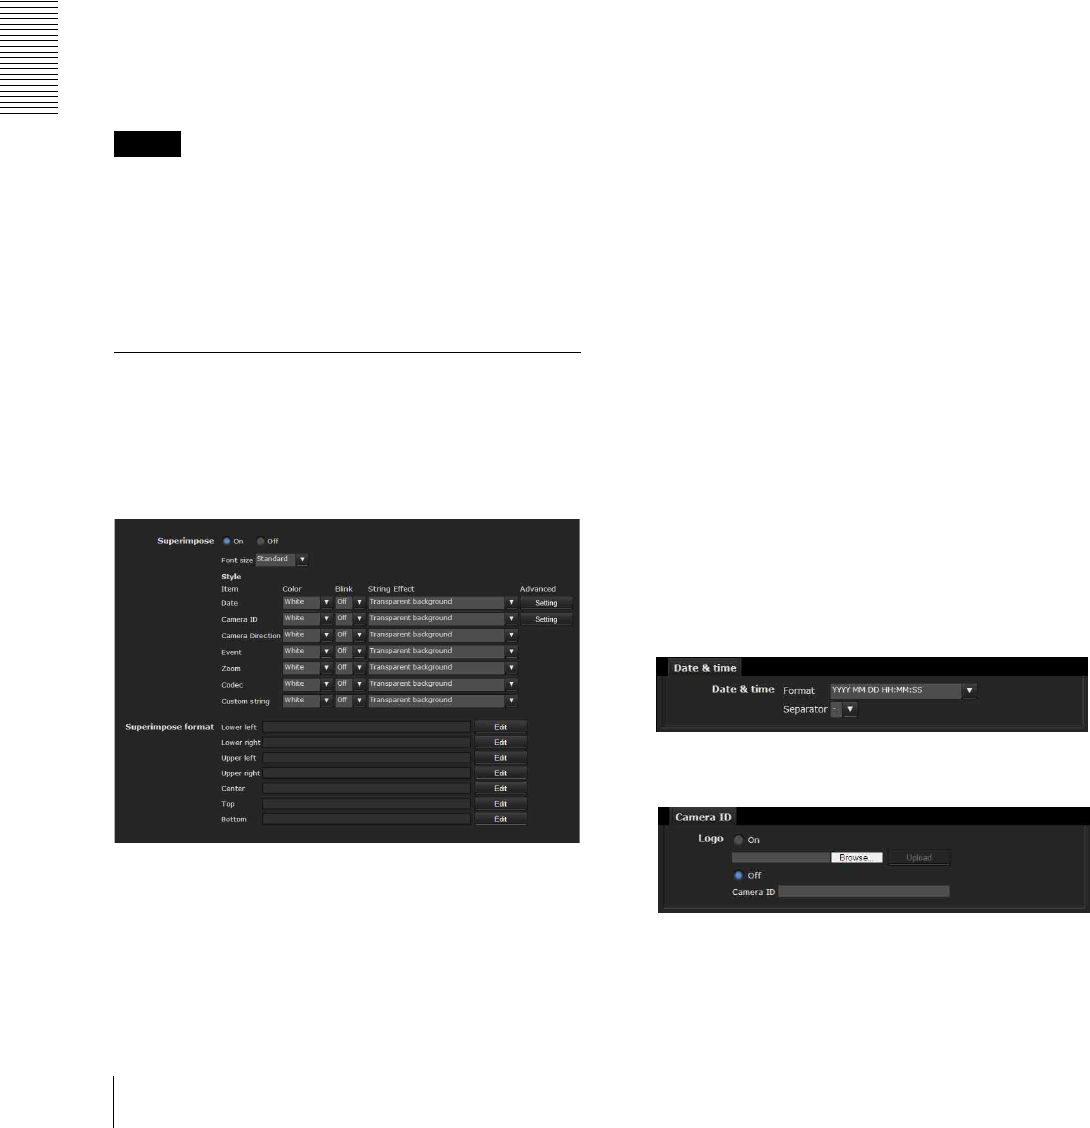
Superimpose
On/Off
When using the Superimpose function, select On.
Font size
Set the font size.
Style
Set the items to superimpose and the format to display
in. Superimpose settings are available for the following
items:
• Date: Set the display settings for date and time.
• Camera ID: Set the display settings for Camera ID
and string.
• Camera direction: Displays the name of a preset
position.
• Event: Configure the display setting for when an
event occurs.
• Zoom: Configure the zoom display.
• Codec: Configure the bit rate and frame rate display
settings. Displays the codec information for Image 1.
• Custom string: Set Custom string to display the text
of your choice.
Display format, including color, can be individually set
for each item.
Color: Select the font color of the superimposed text.
Blink: Select On to enable blinking for the
superimposed text. However, the blinking display is
not available for Date.
String Effect: Enable a string effect for displayed text.
Advanced: Click the Setting button in Date to
configure the format of date/time and the separator.
Click the Setting button in Camera ID to configure
the Camera ID string setting and upload Logo.
Images that can be used as a Logo must be in gif89a
format with an image size up to 640 × 120. The
number of pixels horizontally is even numbered and
the maximum file size is approximately 50 KB. The
Camera ID string and logo can not be used at the
same time.
Click the Setting button from Date.
Click the Setting button from Camera ID.


