9
GB
Getting started
q; qa qs qd qf qg qh
67
12 435
89
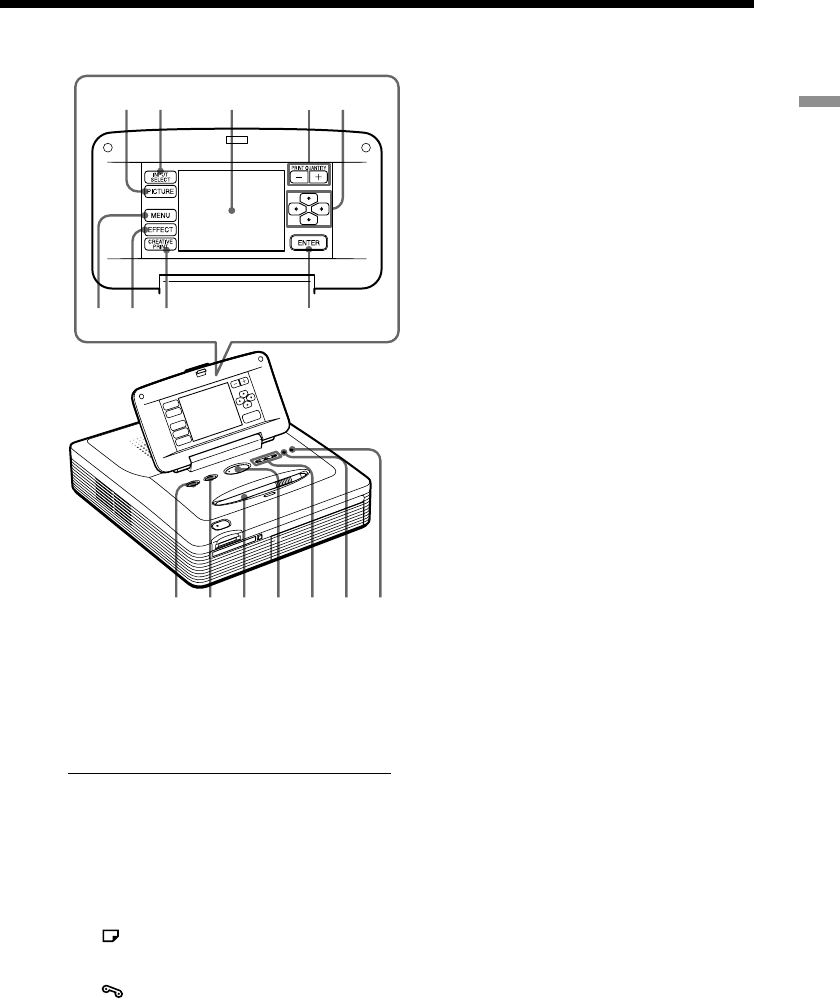
Printer operation panel
The buttons on the LCD touch-sensitive
operation panel (1 through 9) are
designated with square brackets in this
manual (ex. [PICTURE]).
1 PICTURE button (page 24)
Switches the thumbnail list and preview
image.
2 INPUT SELECT button (page 23)
Switches the input. (The selected input
indicator qv lights.)
3 LCD screen (next page)
Displays the images, menu items, or
available options.
4 PRINT QUANTITY (+/–) buttons
(page 25)
Specifies the print quantity.
5 Arrow (B/b/V/v) buttons (page
13)
Moves the cursor to an image or item on
the LCD screen 3.
6 MENU button (pages 59)
Displays the Menu screen.
7 EFFECT button (page 29)
Displays the Effect menu.
8 CREATIVE PRINT button (page 45)
Displays the Creative Print menu.
9 ENTER button (page 13)
Selects the image(s) or item(s) indicated
using the cursor on the screen.
0 ALL button (page 28)
Selects automatic printing of all images.
qa DPOF button (page 28)
Selects automatic printing of all DPOF
images.
qs Stylus (page 12)
Used to select an item on the screen.
Place the stylus in the slot to prevent it
from being lost.
qd PRINT button (pages 26, 28)
qf “MEMORY STICK”/PC CARD/PC
input indicators (pages 17, 23)
The indicator for the current input signal
lights.
qg Paper error indicator (pages 22,
91)
qh
Cartridge error indicator (page
20)
