


46 Connections
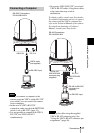
Removing the camera
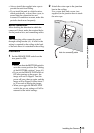
1 Remove the 3 screws used to attach
the camera in step 6 of “Installation.”
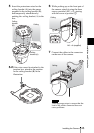
2 While pushing the entire camera up
towards the ceiling, move the camera
to the front.
The hooks will disengage, and you can
remove the camera.
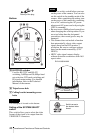
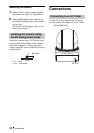
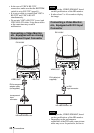
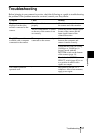
Attach the camera using 3 M3 fixing screw
holes located on the bottom of the camera.
Attach the camera to a fitting with a flat
surface using M3 screws with the following
specifications.
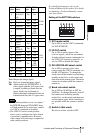
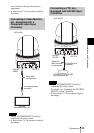
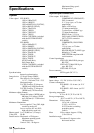
Connections
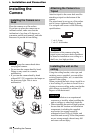
Use the AC power adaptor and AC power
cord to connect the camera to an AC outlet.
Installing the Camera Using
the M3 Fixing Screw Holes
M3 screw
4 = 3 – 5 mm
4 = 1/8 – 7/32 inches
Connecting to an AC Outlet
DC 12 V
EVI-H100S/H100V