13
Basic operations
Basic operations
Camera recording
Make sure that the power source is installed and a cassette is inserted and that the
START/STOP MODE switch inside the LCD panel is set to . Before you record one-
time events, you may want to make a trial recording to make sure that the camcorder is
working correctly.
When you use the camcorder for the first time, power on it and reset the date and time to
your time before you start recording (p. 61). The date is automatically recorded for 10
seconds after you start recording (AUTO DATE feature). This feature works only once a
day.
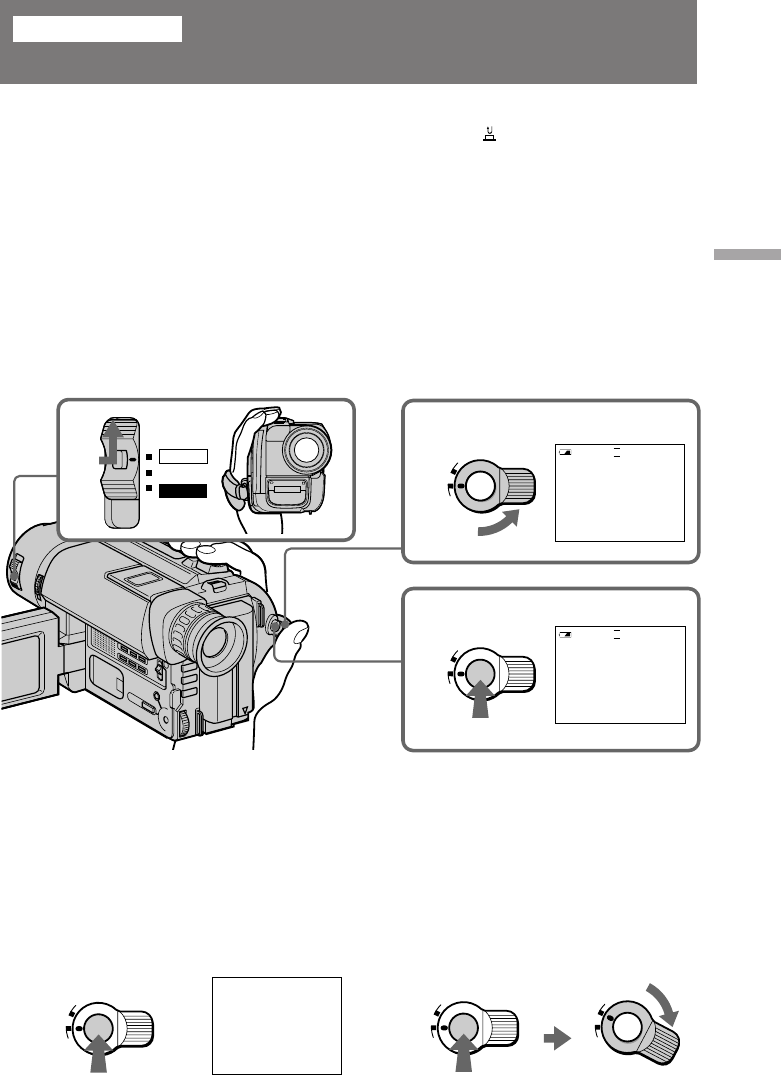
(1) While pressing the small green button on the POWER switch, set it to CAMERA.
(2) Turn STANDBY up to STANDBY.
(3) Press START/STOP. The camcorder starts recording. The “REC” indicator
appears. The red lamp lights up in the viewfinder. The camera recording/battery
lamp located on the front of the camcorder also lights up.
2
3
1
L
O
C
K
START/STOP
S
T
A
N
D
B
Y
L
O
C
K
START/STOP
S
T
A
N
D
B
Y
40min
SP
H
STBY
0:00:00
POWER
OFF
VTR
CAMERA
40min
SP
H
REC
0:00:01
AUTO DATE
JUL 4 1998
To stop recording momentarily [a]
Press START/STOP again. The “STBY” indicator appears in the viewfinder (Standby
mode).
To finish recording [b]
Press START/STOP again. Turn STANDBY down to LOCK and set the POWER switch
to OFF. Then, eject the cassette.
L
O
C
K
START/STOP
S
T
A
N
D
B
Y
START/STOP
L
O
C
K
S
T
A
N
D
B
Y
STBY 0:35:20
L
O
C
K
START/STOP
S
T
A
N
D
B
Y
[a]
[b]


