


Preparing for the Custom Operating System Install Image
You need some files from the C: drive and from your System Recovery DVD. Although you can pull these files in when you need them
from their current locations, for convenience I advise copying them so that you have everything you need all in one place (this is
particularly useful if you want to make back up these files so that you can tweak your custom operating system image later).
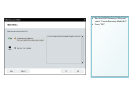
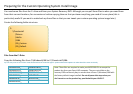
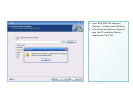
Create the following folder structure:
Files from the C: Drive
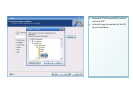
Copy the following files from C:\Windows\I368 to C:\CleanInstall\I386:
Tip: You may want to turn off the “Hide file extensions for known file types” option under Folder Options to make these files easier to identify.
OEMBIOS.BI_ OEMIGLIB.DL_
OEMBIOS.CA_ OEMLOGO.GI_
OEMBIOS.DA_ PIDGEN.DLL
OEMBIOS.SI_ SETUPP.INI
OEMCOA.JP_ DPCDLL.DL_
OEMIG50.EX_
C:
\CleanInstall
\Drivers
\Hotfix
\I386
\OS_Custom
\OS_Default
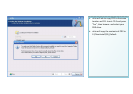
Note: These files are required to make your MCE 2005 CDs to accept the
product key from your Sony VAIO computer. They are not visible on the
recovery DVDs so the only way to extract them is from C:\Windows\I386 with
the factory default image installed. Do not skip over this step unless you
don’t want to use the product key provided with your VAIO PC.