GX5201
3
SVAT ELECTRONICS
Now
You
Can
See
INSTALLING THE LCD MONITOR
Main Operation
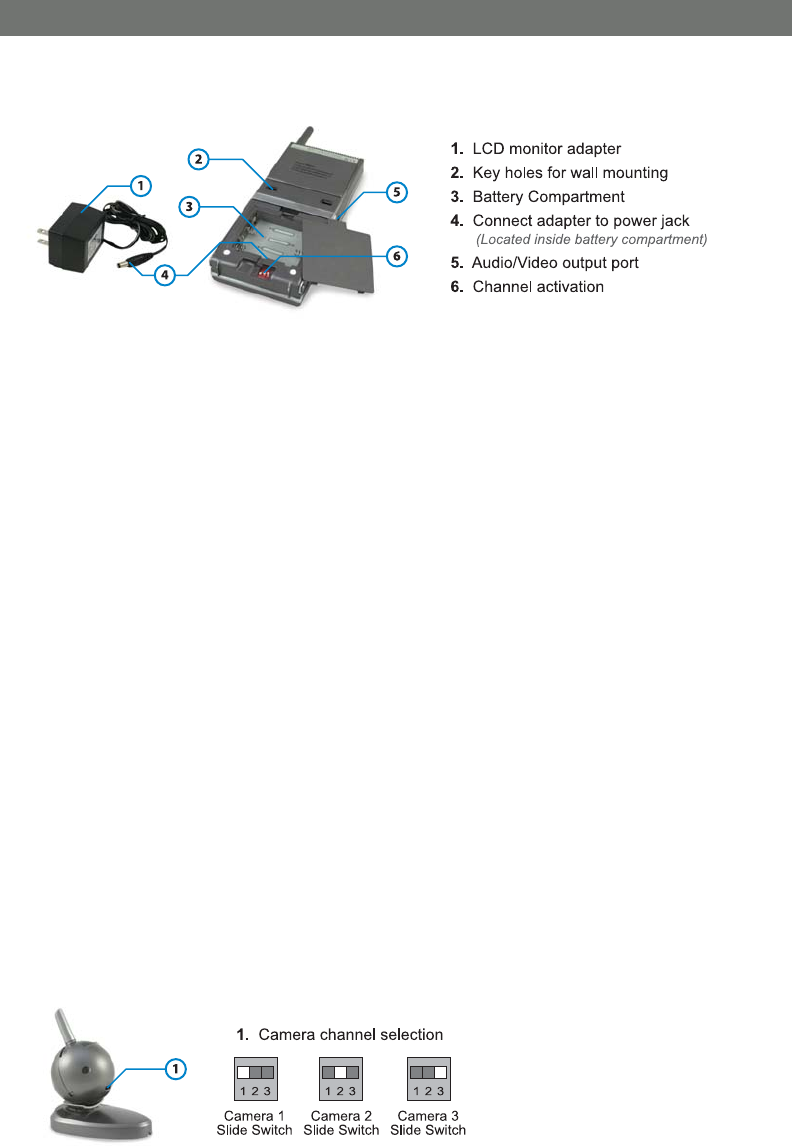
1. Plug the monitor's power supply into the power jack located inside the battery
compartment of the monitor. The monitor can also be operated using 4-AAA batteries.
Note: It is recommended that you use the provided AC adapter to power the monitor.
Batteries are recommended for portability and can last up to 200 minutes.
2. Turn on the monitor by pressing the power button on the top of the unit.
3. To connect the monitor to a VCR or DVR for recording purposes, use the RCA adapter
cable and connect the appropriate end to the A/V output port on the monitor, and the
other corresponding ends to the audio and video inputs of the VCR/DVR.
Avoiding Interference
The 2.4 GHz video signals pass easily through your home's interior walls, but the signal
may be reflected by power wires or plumbing inside the wall. If reception is poor, moving
the camera or monitor may fix this problem. Houses with steel frames may experience
interference as well. Microwave ovens, cordless phones and wireless routers are the
most common sources of interference. Try to avoid mounting the monitor near these or
other sources of RF interference.
ADVANCED FEATURES
Multi-Camera Operation
The GX5201 is designed to work with up to 3 cameras. Additional cameras are sold
separately (indoor - GX515 / outdoor - GX522).
IMPORTANT:
When using more than one camera, make sure each camera is assigned to a specific
channel by assigning them different channels (1-3). The channel switch is located on the
back of the camera.


