


1-4
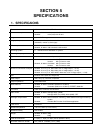
Back-Focus Adjusment
5. LENS
Nots
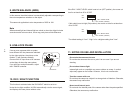
Back-Focus is adjusted at the factory to accommodate most standard lenses.
However, at times, slight adjustment to the IK-629A back-focus is necessary.
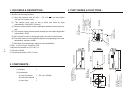
Mount the Lens to the camera first. Then
loosen the Focus Lock Screw. Then rotate
the Focus ring until a clear image is achieved.
Afterwards, tighten the Focus Lock Screw.
When the lens weight is more than 1 kg (2.2 lbs), support it on the lens side
rather than rely on screw that fix the camera to the tripod.
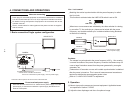
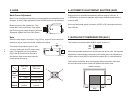
This camera supports two types of auto
-iris lens: Video-type and DC (direct drive)
types. Connect the auto-iris connector
plug to the IRIS terminal on the side of
the camera. Refer to the chart below for
correct wiring and set up.
Recorder Ready
12
3
4
1. + 12V
2. NC
3. VIDEO
4. GND
_
1. Damp (y)
2. Damp+( )
3. Driver+(wh)
_
4. Driver (g)
Video IRIS
Lens
Direct Drive
IRIS Lens
VIDEO
position
DC
position
IRIS
terminal
pin
IRIS
Switch
Focus ring
Focus Lock Screw
IRIS
Auto iris lens
6. AUTOMATIC ELECTRONIC SHUTTER (AES)
7. BACKLIGHT COMPENSATION (BLC)
Exposure time is controlled automatically within a range of 1/60 sec. to
1/100000 sec. to obtain an adequate signal when the back panel switch is
turned to AES.
When the back panel switch is turned to VIDEO or DC, the exposure time is
fixed 1/60 sec.
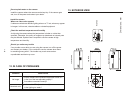
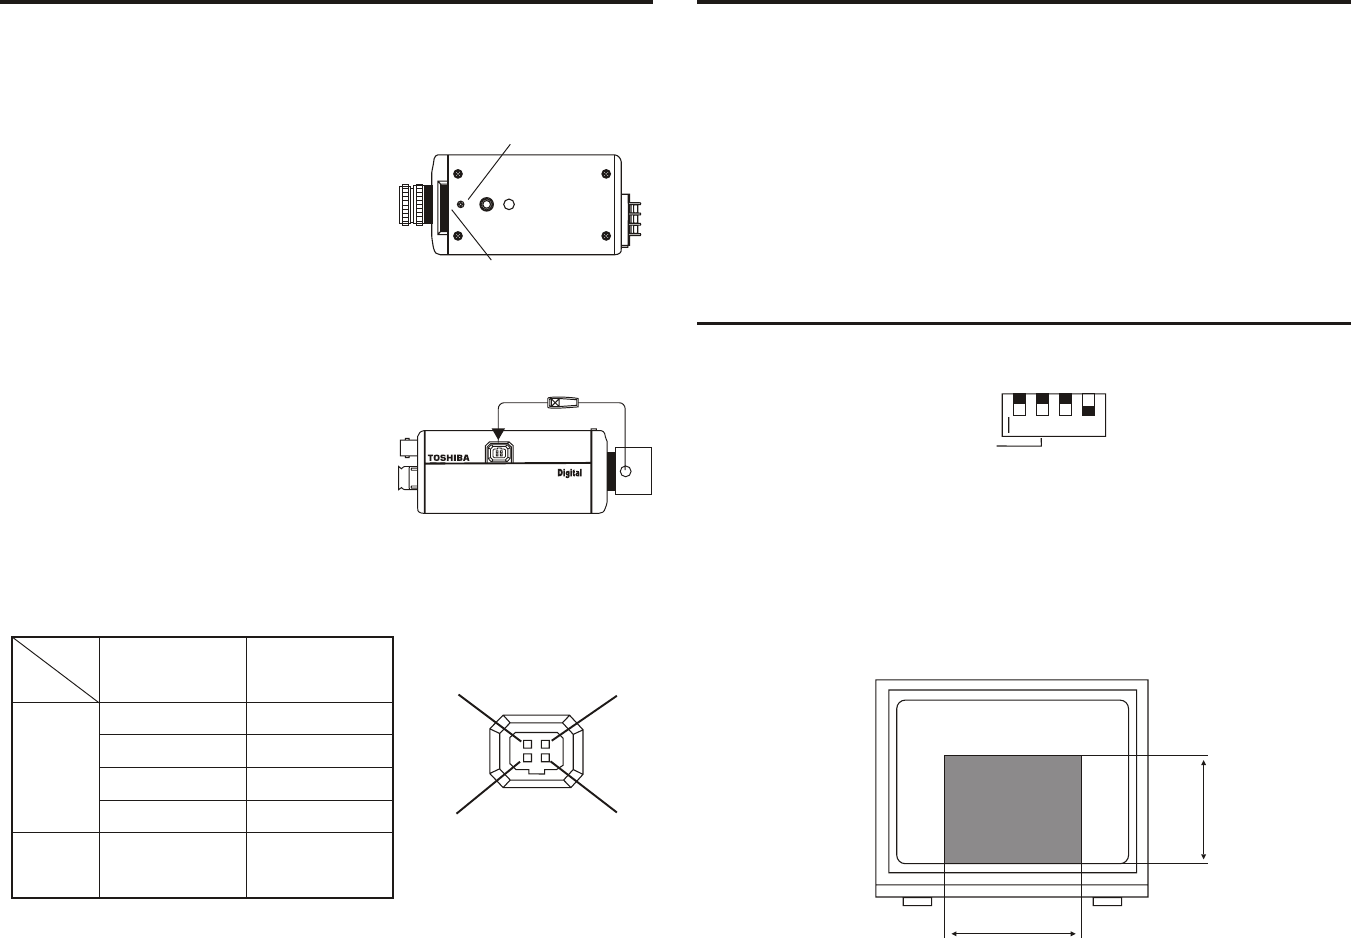
This function is activated when the BLC switch is set to on .
When the automatic electronic iris and the auto iris lens is used, the exposure
adjustment is automatically performed so that a best picture is obtained at a
monitor zone of about 60% in horizontal and about 60% in vertical direction.
This function is effective when a strong light enters the portion other than
this zone and auto iris lens closes and darkens the area to view.
60%
60%
(Monitor screen)
ON
OFF
BLC
O
N
12
3
4