


141414
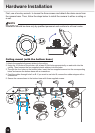
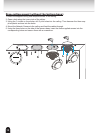
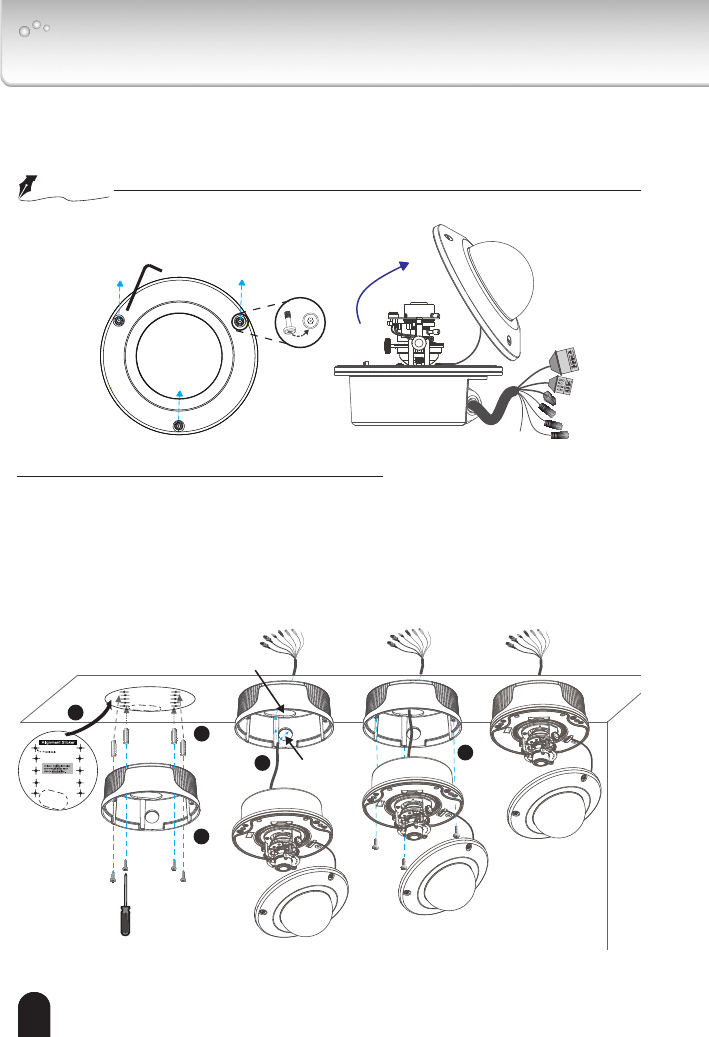
First, use a hex key wrench to loosen the three screws and detach the dome cover from
the camera base. Then, follow the steps below to install the camera to either a ceiling or
a wall.
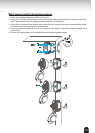
Ceiling mount (with the bottom base)
1. Attach the supplied alignment sticker to the ceiling.
2. Using the 10 circles on the sticker, drill at least 2 pilot holes symmetrically on each side into the
ceiling. Then hammer the four supplied plastic anchors into the holes.
3. Through the four holes on the bottom base, insert the four supplied screws into the corresponding
holes and secure the bottom base with a screwdriver.
4. Feed the cables through hole A or B. If you want to use hole B, remove the rubber stopper with a
screwdriver.
5. Secure the camera base to the bottom base with three supplied screws.
N.C.
N.C.
N.C.
AC24V
AC24V
1
2
3
4
5
B
A
Hardware Installation
NOTE
Installation should be done only by qualied personnel and conform to all local codes.