© Copyright 2013 TRENDnet. All Rights Reserved.
TRENDnet User’s Guide
TV-IP851WC / TV-IP851WIC
2
Product Hardware Features
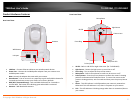
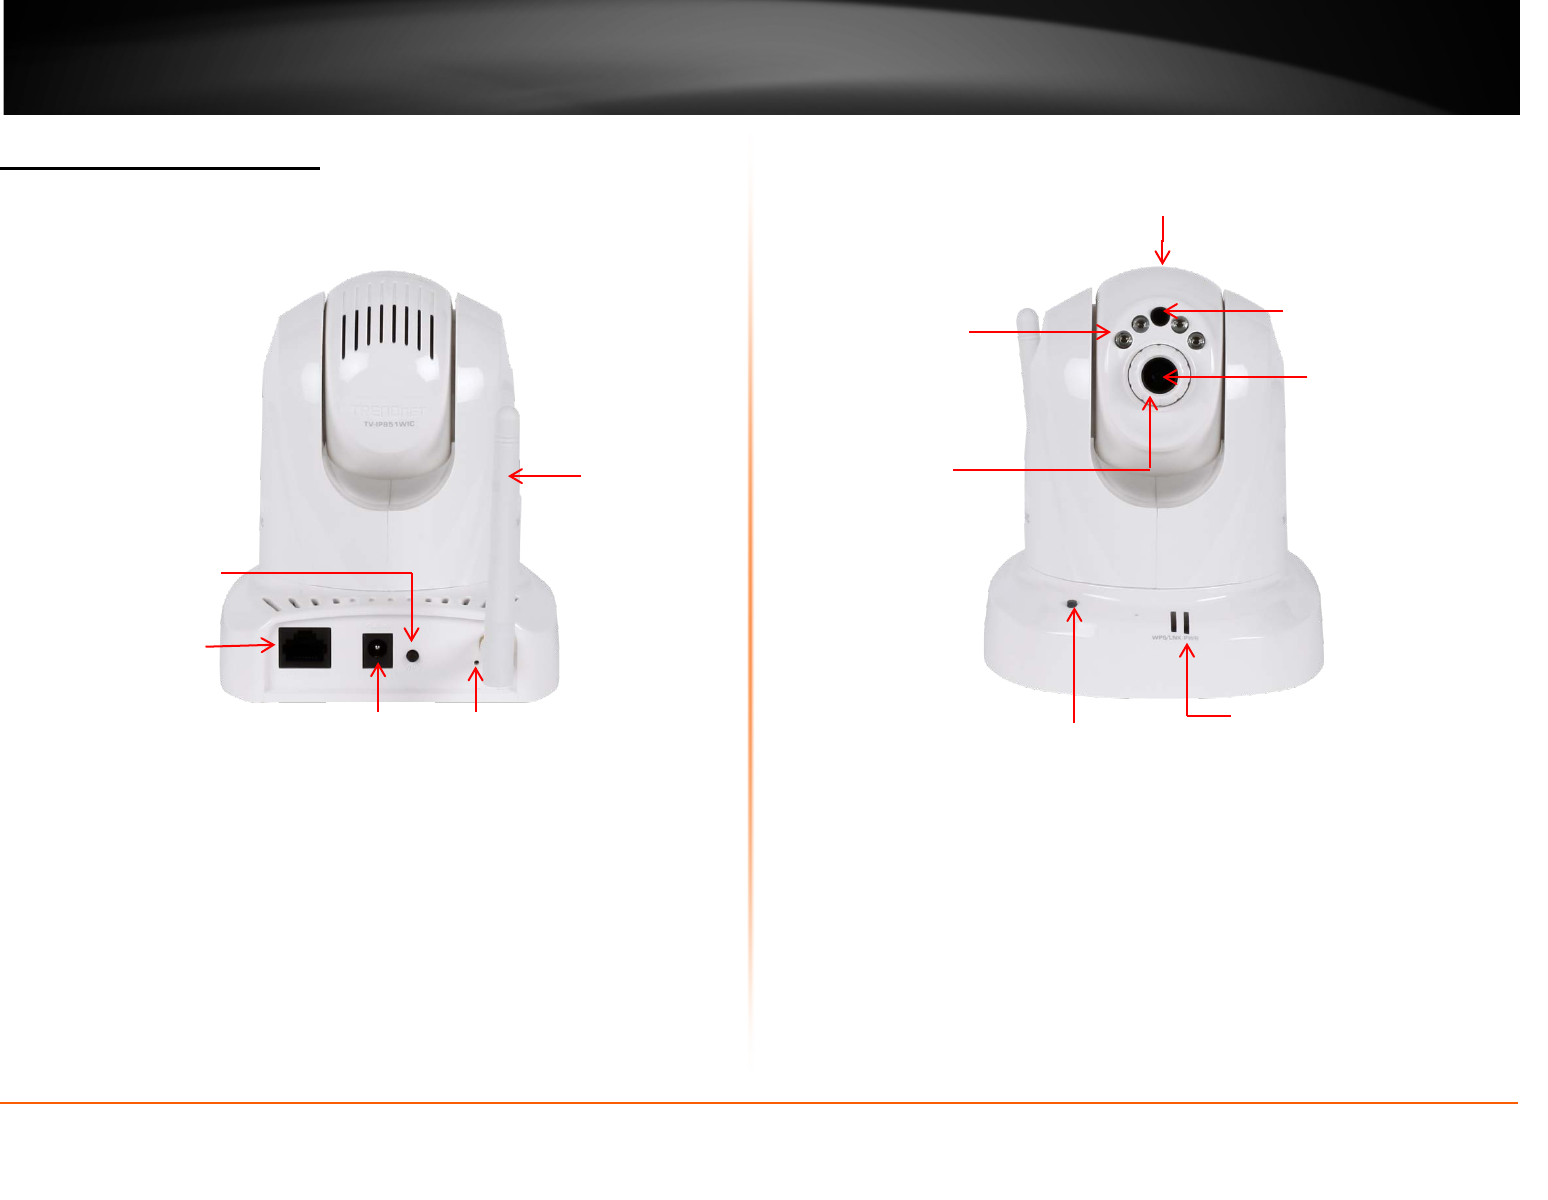
Rear Panel View
• LAN Port – Connect Ethernet cables to your wired network devices.
• Power Port – Connect the included power adapter from your camera to an
available power outlet.
Note: Use only the adapter that came with your camera.
• Reset Button – Use an item such as a paperclip to push and hold this button for
3 seconds and release to reset your camera to its factory defaults.
• WPS (Wi-Fi Protected Setup) – Push and hold this button for 3 seconds to
activate WPS. The button LED is blinking green when WPS is activated.
• Antenna – 2dBi detachable antenna
Front Panel View
• IR LED – Built-in 4 IR LED for night vision uses. (for TV-IP851WIC)
• Light Sensor – Detects the light source to turn IR on or off.
• Focus Ring – Turn to adjust the focus of the camera.
• Microphone – Built-in microphone for audio can be turn on or off.
• Privacy button – Press the privacy button to redirect the camera’s viewing
position to a downward and obscured view. To return the camera to the
previous viewing position, wait 5 seconds and then press the privacy button
again.
• Power - This LED indicator is solid blue when your camera is powered on.
Otherwise if this LED indicator is off, there is no power to your camera.
• Link – This LED indicator is blinking orange when there is connection/data to
your camera.
IR LED
Power port
LAN port
Light Sensor
Microphone
Camera Lens
Power/Link LED
Antenna
WPS button
Reset button
Privacy button
Focus Ring


