Network Camera User’s Guide
60/83
“Quality”
Highest (The same as “Clarity” on control panel )
High
Medium (The same as “Default” on control panel )
Low
Lowest (The same as “Fluency” on control panel )
The control method is the same as control panel’s “Quality”.
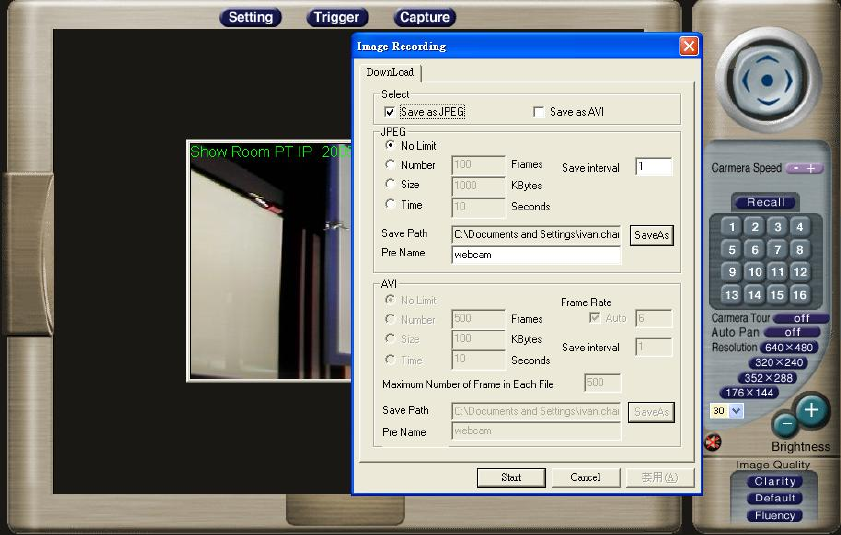
“Image Recording…-> Save as JPEG”
Select “Image Recording…”
The “Image Recording” pop-up window displays, select
“Save as JPEG”
Input the “Download Number” for the number of images desire to be saving, or
“Download No Limit” to save the images continuous, until the “Stop Image Recording” is
selected.
Select “SaveAs” , the pop-up window to select the save path and file name prefix, select
“Save” to continue.


