Network Camera User’s Guide
63/83
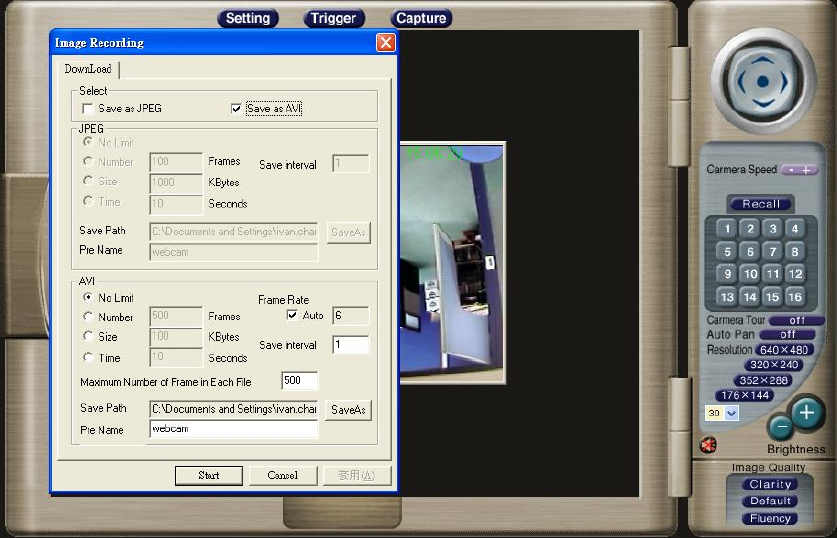
“Image Recording…-> Save as AVI”
1. Select “Image Recording…”
2. The “Image Recording” pop-up window displays, select
3. “Save as AVI”
4. Input the ”Avi Frame” and “Max Jpeg Num” on each AVI file, until the “Stop Image
Recording” is selected. “Avi Frame” is the frame rate setting of the recorded AVI
file.
5. For each AVI file, the maximum saved images in each file are specified in “Max
Jpeg Num”, once the saves image on each AVI file are reached by this number,
then a new AVI file will created to save the following images, until the “Stop
Image Recording” is selected.
6. Select “SaveAs”, the pop-up window to select the save path and file name prefix,
select “Save” to continue.
Select “Start” to start the AVI files recording.
During the AVI file recording, a red icon displays on right-down position of the image to
indicate the AVI saving process.


