


11
Video Mode
Shooting Videos
1. Turn on your Digital Video Camera.
2. The first mode to appear is the Video mode.
3. The amount of recording time available for the resolution selected will appear on the LCD screen.
4. Compose your object with the LCD screen.
5. Press the OK/Shutter button to start shooting your video. The built-in microphone enables you to
record your video with sound.
6. The elapsed time will begin to appear on the bottom right corner of the LCD screen.
7. Press the OK/Shutter button again to stop shooting and save your video as an AVI video file on the
memory card.
8. The amount of time that you can capture videos depends on the size of the SD memory card
inserted and the video resolution selected.
Note: The lower the resolution setting the more recording time is available. However videos
recorded at lower resolution are of less quality than videos recorded at the higher quality.
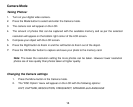
Changing the Video settings
1. Press the Menu button in the Video mode.
2. The “AVI Option” menu will appear on the LCD with the following options:
EXIT, RESOLUTION, FREQUENCY, SPEAKER and LANGUAGE