18
1. Basic operations
4Set the wipe direction.
On the Key menu, use [F1] to display the Transition sub menu.
Use [F1] to set “Normal” or “Reverse” using the Keyout Pattern item.
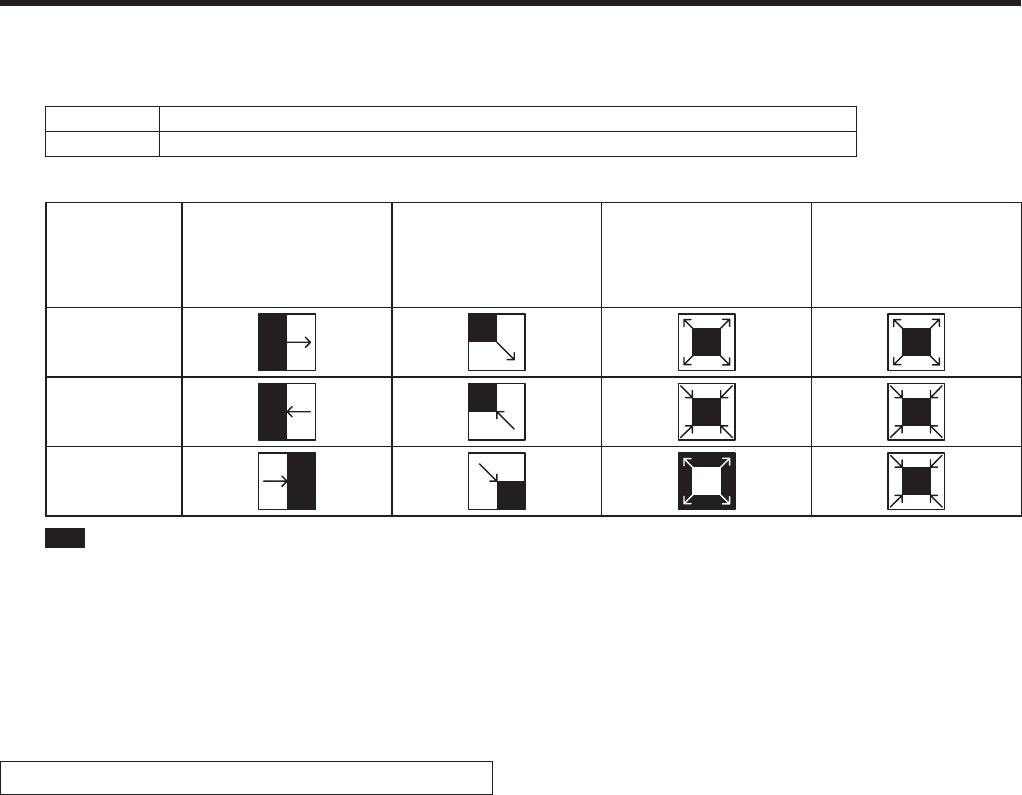
Normal The key out pattern moves in the same direction as the key in pattern.
Reverse The key out pattern moves in the opposite direction from the key in pattern.
<Pattern examples>
Pattern example 1 Pattern example 2
Pattern example 3
WIPE1: 5
WIPE2: 1 to 7
Pattern example 4
SQ1: 5
SQ2: 1, 2, 4 to 7
3D1: 5
3D2: 1 to 3
Key in
SQ
SQ
Key out
(Normal)
SQ
SQ
Key out
(Reverse)
SQ
SQ
: This indicates the areas where keys are combined.
The operations for pattern example 3 are performed for the “WIPE1: 5” and “WIPE2: 1 to 7” patterns.
The operations for pattern example 4 are performed for the “SQ1: 5”, “SQ2: 1, 2, 4 to 7”, “3D1: 5” and “3D2: 1 to 3”
patterns. The same operations are performed for normal and reverse.
5Execute the transition.
Press the [AUTO] button in the transition area to automatically execute the transition at the transition time that has been
set.
Alternatively, execute the transition manually by operating the fader lever.
Key auto transition
When the [KEY ON] button in the transition area is pressed, the transition is automatically executed at the transition time that
has been set.
During key in, the indicator of the [KEY ON] button blinks in red, and it lights in red when the transition is completed.
If the [KEY ON] button is pressed with the picture completely keyed in, the Key image transition (key out) is executed.
During key out, the indicator of the [KEY ON] button lights in red, and it goes off when the transition is completed.
If the [KEY ON] button is pressed during the transition, the transition direction is reversed.
