22
En
Connecting and disconnecting USB
devices
Connecting USB devices
Connect the USB device to the USB device insertion slot.
Disconnecting USB devices
1 Press the [USB STOP] button for over 2 seconds, until
the USB indicator turns off.
Do not disconnect the USB device or turn off this unit’s power while the
USB indicator is lit or flashing. Doing so could delete this unit’s manage-
ment data and damage the USB device, making it impossible to read.
2 Disconnect the USB device.
Playback
This section describes basic track selection operations and how to
switch the screen.
Playing media connected to or inserted in
this unit
1 Load the medium in this unit.
= Inserting discs (p.21)
=
Connecting USB devices (p.22)
2 Press the corresponding medium button ([CD] or
[USB]).
The tracks or folders are displayed on a list.
The medium whose contents are displayed on the main unit display can
be switched.
[CD] button: Displays the contents on the inserted disc.
[USB] button: Displays the contents on the connected USB device.
!
If tracks are loaded from another medium, a warning message is
displayed. Check the message, then press the rotary selector. The
warning message turns off and the medium is switched.
! If the storage device (USB) contains rekordbox library information,
the rekordbox library is displayed.
! When a link is established with remotebox, the contents of the USB
device are displayed on the mobile device, not on this unit.
3 Turn the rotary selector.
Move the cursor and select the item.
! Press the rotary selector to move to a lower level in the folder. Press
the [BACK] button to return to the level above.
! When the [BACK] button is pressed for over 1 second or the medium
button for the medium being browsed is pressed, the display moves
to the topmost level.
4 Select the track and press the rotary selector.
When the track is loaded, the screen switches to the information display
mode.
The track is loaded, playback starts, and the corresponding medium
button flashes.
! When a track has been loaded while pausing, press the
[PLAY/PAUSEf] button to start playback.
! When auto cue is turned on, the disc pauses at the audio start posi-
tion. In this case, press the [PLAY/PAUSEf] to start playback.
For details on auto cue, see Setting auto cue on page 18.
If the medium contains the rekordbox library
If the USB device connected to this unit contains the rekordbox library
information, the rekordbox library is displayed.
!
Music files are displayed in the categories (album, artist, etc.) set
with rekordbox.
Using remotebox
Tracks on USB devices connected to this unit can be browsed and
loaded from mobile devices via wireless LAN.
1 Connect the mobile device by wireless LAN.
2 Launch remotebox on the mobile device and establish
the link.
3 Connect the USB device to this unit’s USB device
insertion slot.
4 Operate remotebox on the mobile device to select the
track.
5 Operate remotebox on the mobile device to select the
deck on which the track is to be loaded, then tap.
Track loading starts. The jog dial indicator on the deck on which the
track is being loaded flashes.
Once playback is possible, the jog dial indicator stops flashing, remain-
ing lit, the track name is displayed on the main unit display and playback
starts.
! Also see the remotebox operating instructions.
Outputting sound
Before outputting sound, check that this unit and the surrounding
devices are properly connected. For instructions on connecting, see
Connecting the input/output terminals on page 10 or Connecting by wire-
less LAN on page 11.
Set the volume of the power amplifier or powered speakers connected to
the [MASTER OUT 1] and [MASTER OUT 2] terminals to an appropriate
level. Note that loud sound may be output if the volume is set too high.
To output the sound of channel 1 [CH 1]
To output the sound of [CH 2] (channel 2), replace [CH 1] with [CH 2],
[DECK 1] with [DECK 2] and [PHONO1/LINE1] with [PHONO2/LINE2] in
the procedure below.
1 Switch the [DECK 1, PHONO1/LINE1] selector switch in
the [CH 1] section.
Select the input source for [CH 1] from among the devices connected to
this unit.
— [DECK 1]: Selects the USB device, CD or MIDI.
— [PHONO1/LINE1]: Selects the device connected to the
[PHONO1/LINE1] terminals.
2 Turn the [TRIM] control in the [CH 1] section
clockwise.
Adjusts the audio level input to the [CH 1] terminal.
The [LEVEL] indicator lights when sound is properly being input to
[CH 1].
Adjust the [TRIM] control so that the orange indicator lights where the
track’s volume is highest (at the climax, etc.)
Be careful that the red indicator does not light, or the sound could be
distorted.
3 Move the [CH 1] channel fader to the back side.
The level of the sound output from the [CH 1] terminals is adjusted.
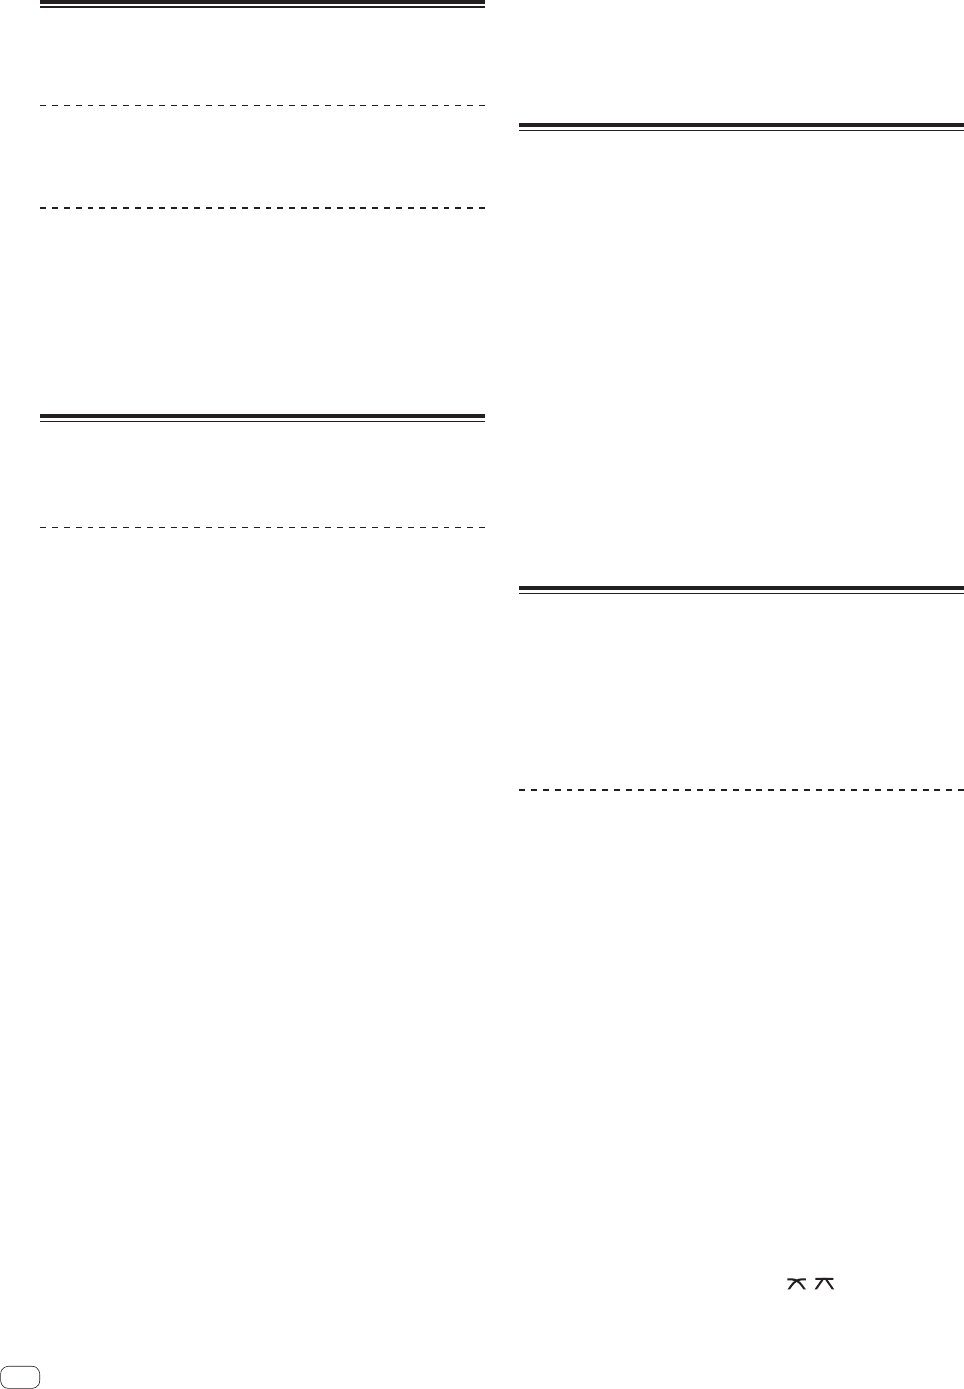
4 Switch [CROSS F. CURVE THRU, , ] (the crossfader
curve selector switch).
This switches the crossfader curve characteristics.
— [THRU]: Choose this when you do not want to use the crossfader.
