9
En
Quick Start Guide
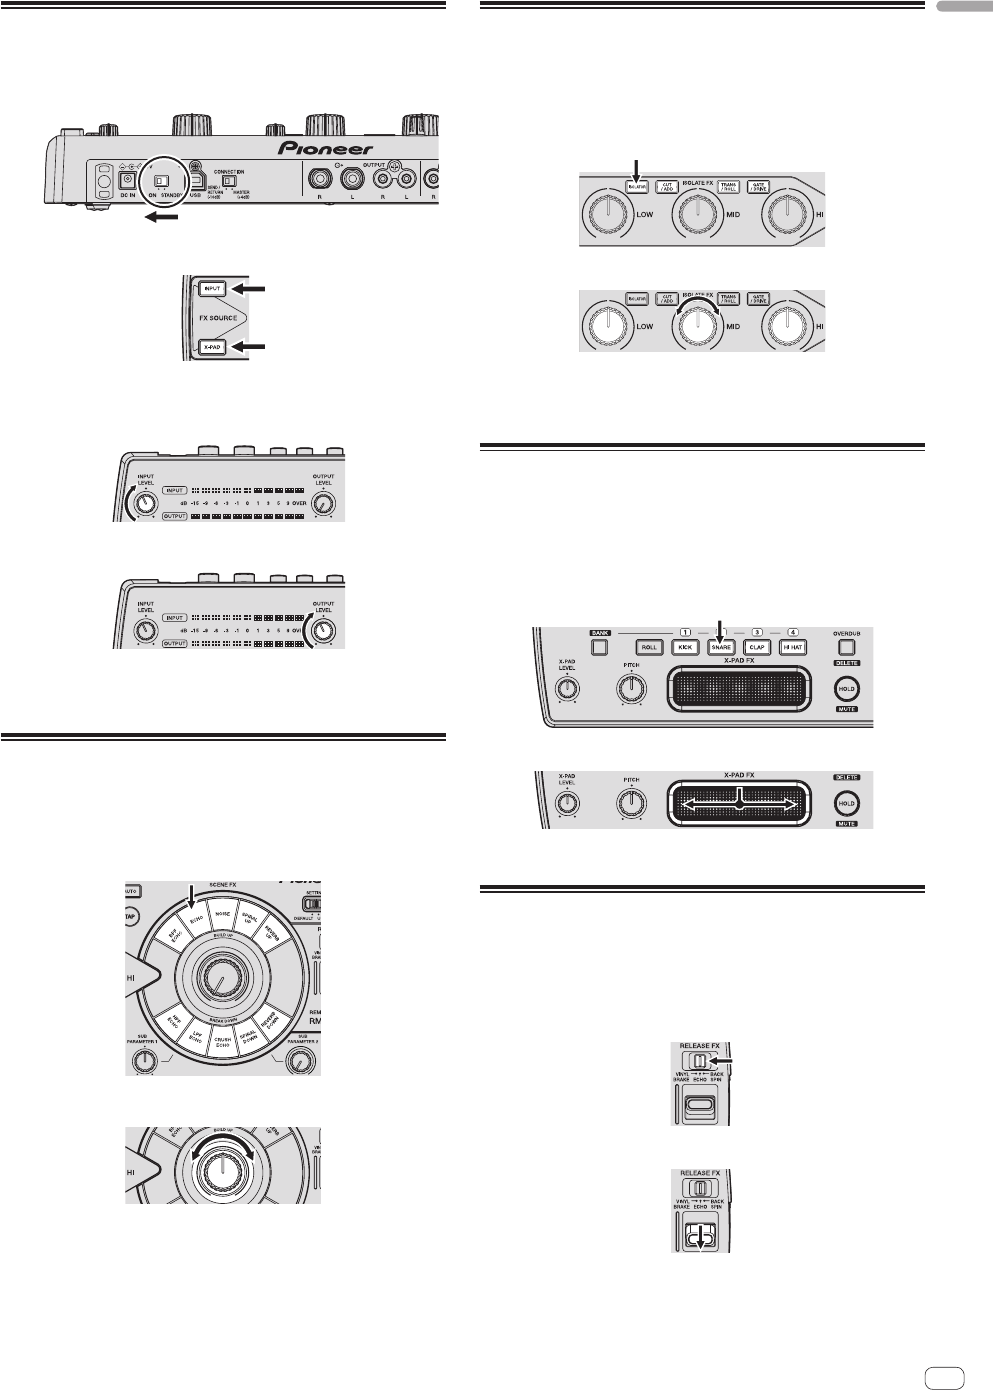
Preparations for using the effects
1 Slide the [ON, STANDBY] switch on the rear panel of
this unit to the [ON] position.
2 Check that the [INPUT] and [X-PAD] buttons are lit.
! If the [INPUT] and [X-PAD] buttons are not lit, press the buttons to
light them.
3 Turn the [INPUT LEVEL] control.
4 Turn the [OUTPUT LEVEL] control.
5 Use the effects.
For instructions on using the various effects, see the sections below.
Using the SCENE FX function
When the control at the center is turned, an effect adding new sound
to the track or removing sound from the track is applied. This lets you
achieve a new sound for the track.
1 Press one of the [SCENE FX] buttons.
2 Turn the [SCENE FX] control.
When the control is turned clockwise, the selected SCENE FX effect
changes greatly.
When the control is turned fully counterclockwise, the SCENE FX effect
is not applied; only the original sound is output.
Using the ISOLATE FX function
When the [LOW], [MID] or [HI] control is turned, the strength of the low,
mid or high frequency effect increases or decreases. It is also possible
to isolate the sound of specific instruments in the low, mid or high fre-
quency ranges and increase or decrease the number of sounds.
1 Press one of the [ISOLATE FX] buttons.
2 Turn the [LOW], [MID] or [HI] control.
When the control is turned clockwise or counterclockwise, the selected
ISOLATE FX effect changes.
When the control is set to the center position, the ISOLATE FX effect is
not applied; only the original sound is output.
Using the X-PAD FX function
With this function, effects can be applied to this unit’s internal sound
sources and added to the currently playing track. Instead of the inter-
nal sound sources, it is also possible to load and use sampled sound
sources prepared on SD memory cards and to sample and use the cur-
rently playing sound.
1 Press one of the [X-PAD FX] buttons.
2 Touch the [X-PAD].
The selected X-PAD FX effect changes depending on the position on the
[X-PAD] that is touched.
Using the RELEASE FX function
When the [RELEASE FX] lever is moved towards you, the original sound
disappears and only the effect sound is output. Move the lever is back to
its original position to transition smoothly from the effect sound to the
original sound.
1 Switch the [RELEASE FX] selector switch.
2 Move the [RELEASE FX] lever towards you.
The selected RELEASE FX effect changes according to the position of
the lever.
When the lever is moved back to its original position, the effect turns off.
Any SCENE FX, ISOLATE FX or X-PAD FX effects that were on before are
also turned off.
