En
7
Connections and part names
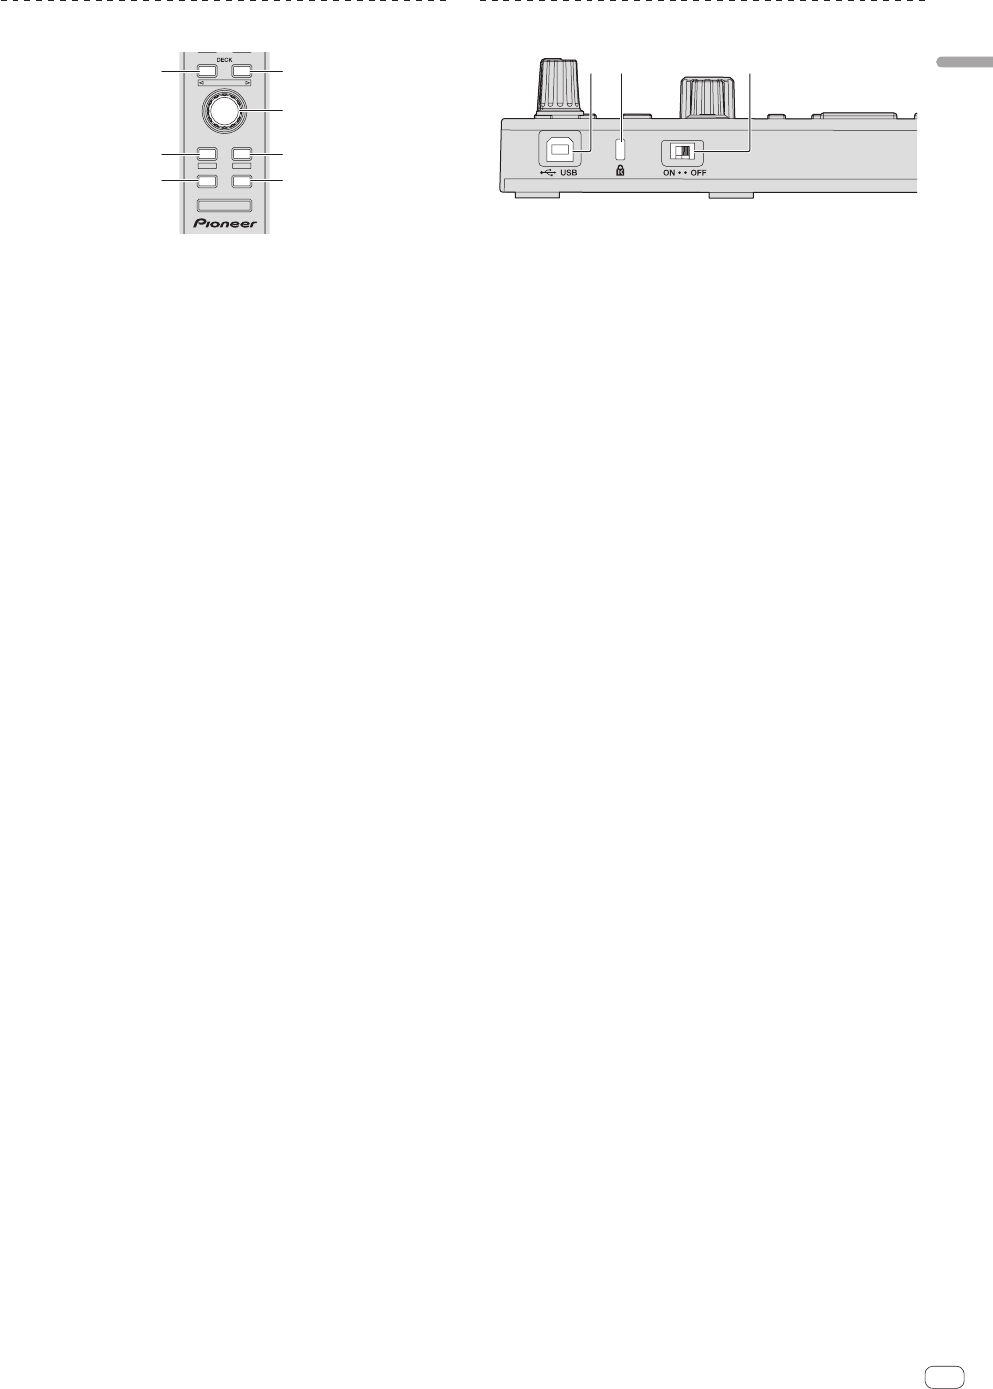
Browser section
34
PANEL SELECT
• BACK
—
UTILITY
LOAD
PREPARE
VIEW
LOAD LOAD
AREA
SHIFT
1 DECK button
Press:
Selects the deck to be used.
The [DECK] button lights when deck 3 or deck 4 is selected. It does
not light when deck 1 or deck 2 is selected.
[SHIFT] + press:
Selects and opens the [REC] panel, [DJ-FX] panel or [SP-6] panel.
2 Rotary selector
Turn:
The cursor in the library or on the [CRATES] panel moves up and
down.
Press:
The cursor moves between the [CRATES] panel and library each time
the rotary selector is pressed.
The cursor on the [Files] panel moves to a lower layer.
The cursor on the [Browse] panel moves to the next category.
3 LOAD PREPARE (AREA) button
Press:
Loads tracks to the [Prepare] panel.
[SHIFT] + press:
Selects and opens the [Files] panel, [Browse] panel, [Prepare] panel
or [History] panel.
4 LOAD button
Press:
Loads the selected track onto the currently selected deck.
! When the [LOAD] button is pressed twice, the tracks loaded in
the selected deck on the opposite side are loaded into the deck
whose [LOAD] button was pressed. When this is done while
a track is playing, the track is played from the same position.
(Instant Double)
5 BACK button
Press:
The cursor moves between the [CRATES] panel and library each time
the button is pressed.
Press for over 1 second:
Switches to the utilities mode.
= Changing this unit’s settings (p.20)
[SHIFT] + press:
Switches the Serato DJ layout.
Main unit side panel
DIMMER MODE
12 3
1 USB port
Connect to a computer.
! USB hubs cannot be used.
2 Kensington security slot
3 DIMMER switch
ON: Sets the LED’s brightness to dim.
OFF: Sets the LED’s brightness to bright.
! Power consumption can be decreased by setting the LED’s
brightness to dim.
Disconnect the USB cable connected to this unit before switching
the [DIMMER] switch from the [ON] position to the [OFF] position.
The indicators will not get brighter if the switch is set to the [OFF]
position while the USB cable is connected.
