En
8
Basic Operation
Starting the system
The computer and Serato DJ-certifiable DJ controller or DJ mixer must
be connected beforehand.
! For instructions on operating the Serato DJ software and the Serato
DJ-certifiable DJ mixer or DJ controller, see their respective operat-
ing instructions.
1 Connect the Serato DJ-certifiable DJ mixer or DJ
controller to the computer by USB cable.
2 Turn on the computer’s power.
3 Turn on the power of the Serato DJ-certifiable DJ
mixer or DJ controller.
4 Launch Serato DJ.
! When using Windows 7
From the Windows [Start] menu, click the [Serato DJ] icon under
[All Programs] > [Serato] > [Serato DJ].
! For Mac OS X
In Finder, open the [Applications] folder, then click the [Serato DJ]
icon.
5 Connect this unit to your computer via a USB cable.
When this unit and Serato DJ are properly connected, this unit’s pad
mode button (by default the [HOT CUE] mode button) lights.
! This unit operates with the operating system’s standard driver. There
is no need to install separate driver software for this unit.
Importing tracks
Operate the Serato DJ software to add tracks to the library.
! For instructions on operating the Serato DJ software and the Serato
DJ-certifiable DJ mixer or DJ controller, see their respective operat-
ing instructions.
Loading tracks
1 Press this unit’s [BACK] button or rotary selector and
move the cursor to the crates panel on the computer’s
screen.
2 Turn the rotary selector to select the crate, etc.
3 Press the rotary selector and move the cursor to the
library on the computer’s screen.
4 Turn the rotary selector and select the track.
5 Press the [LOAD] button to load the selected track
onto the deck.
To load the track onto deck 3 or deck 4, first press the [DECK] button so
that it lights. The deck onto which tracks are loaded is associated with
deck selection.
Playing tracks
Operate the DJ player, analog player, DJ controller, etc., to play the track.
! For instructions on operating the Serato DJ software and the Serato
DJ-certifiable DJ mixer or DJ controller, see their respective operat-
ing instructions.
Using the performance pads
The performance pads control the hot cue, hot loop, loop roll, auto loop,
slicer, manual loop and sampler functions.
These functions are switched using the respective pad mode buttons
(the [HOT CUE] mode button, [ROLL] mode button, [SLICER] mode but-
ton and [SAMPLER] mode button).
This example describes using the hot cue mode.
! For ways to use the other pad modes, see Using the performance
pads on page 10.
1 Press the [HOT CUE] mode button.
The [HOT CUE] mode button lights and the mode switches to the hot
cue mode.
2 In the play or pause mode, press a performance pad
to set the hot cue point.
When a hot cue point is set, that performance pad lights.
3 Press the performance pad at which the hot cue point
was set.
Playback starts from the hot cue point.
Using effects
Serato DJ includes two effects units, FX1 and FX2. These effects can be
applied to the overall sound or to the sound of the selected deck. Here
we describe the procedure for operating this unit to assign effects unit 1
(FX1) when Serato DJ’s DJ-FX mode is set to the multi-FX mode.
For details, see Advanced Operation on page 10.
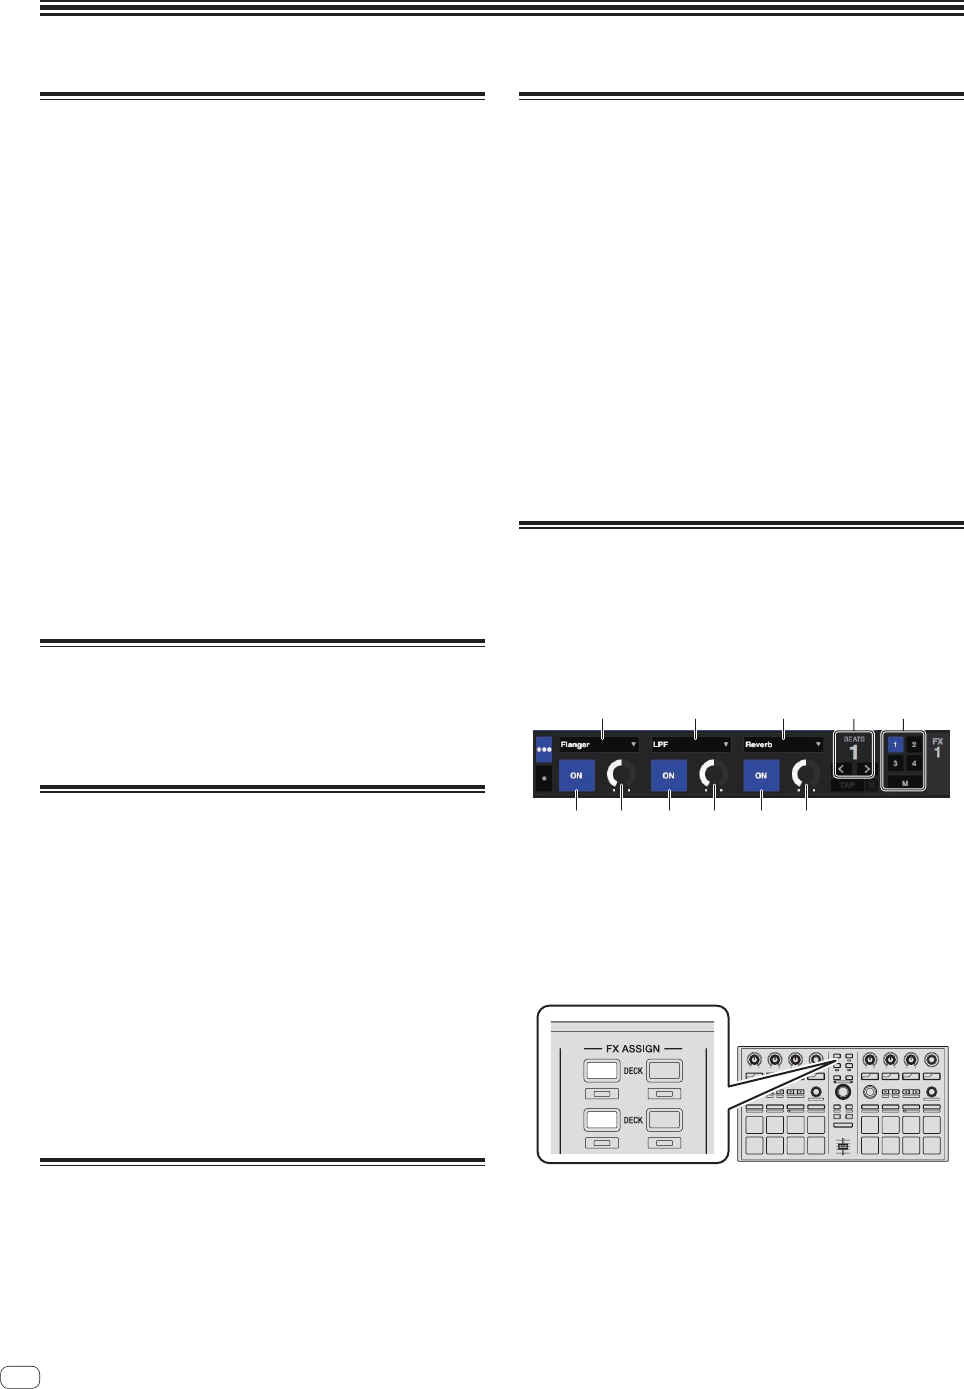
Serato DJ effects unit screen display
1 1
3
1 This displays the currently selected type of effect.
2 This displays the effect time.
3 The number of the deck to which that effects unit is assigned is
highlighted.
4 This displays the effect parameter status.
5 This displays whether the effect is on or off.
1 Press the [FX ASSIGN] button on the left side to select
the deck to which the effect is to be assigned.
ON
SYNC
SLIP
1
2
34
2
1
1
3
4
22
1
Press the [FX ASSIGN] 1 button to assign the effect to deck 1, the
[FX ASSIGN] 2 button to assign the effect to deck 2.
! Press the [FX ASSIGN] 1 button while pressing the [SHIFT] but-
ton to assign the effect to deck 3, press the [FX ASSIGN] 2 button
while pressing the [SHIFT] button to assign the effect to deck 4.
! To apply the effects to the overall (master) sound, click [M] on the
computer.
