T
T
o
o
u
u
c
c
h
h
B
B
u
u
t
t
t
t
o
o
n
n
C
C
o
o
n
n
t
t
r
r
o
o
l
l
P
P
a
a
n
n
e
e
l
l
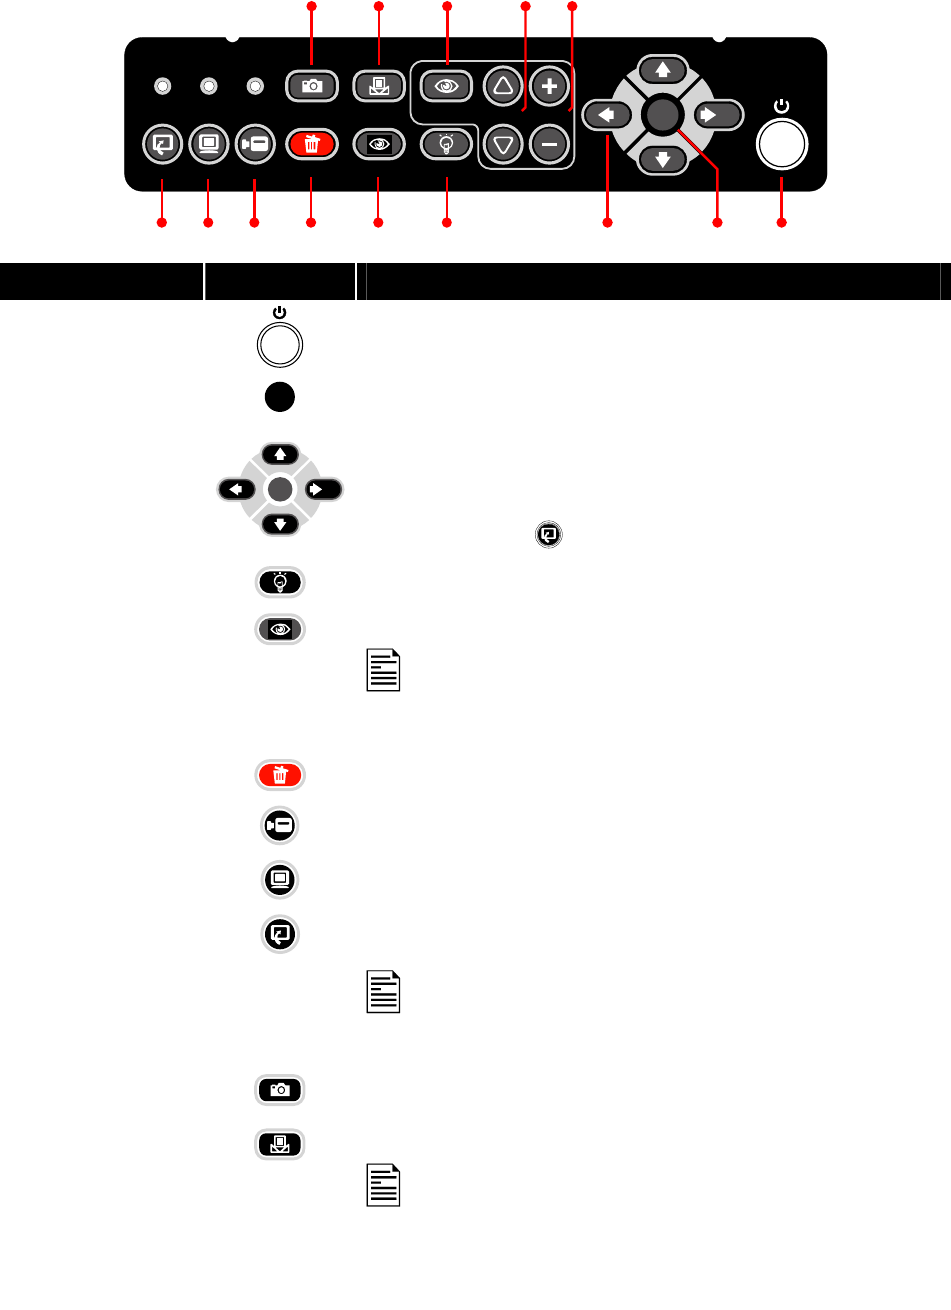
The touch button control panel located on the top side of AVerVision530 provides quick access to commonly
used functions.
LIGHT
AUTO FOCUSFOCUS ZOOM
PLAYBAC K PC C AM ERA
CAPTURE
DELETE NIGHT VIEW
MENU
AVerVision530
AWB/
MEASURE
ENTER
(1)
(14)(13)(12)(11)(10)
(9) (8) (7) (5)(6) (4) (3) (2)
Name Button Function
(1) POWER
Turn on or switch to output the video signal to RGB/DV-I or S-
Video/Video port. The unit switches to standby mode when this button
is pressed for 2 sec. (See LED Power Button)
(2) MENU
MENU
Call up and exit the OSD main and sub-menu.
(3) ×ØÕ(Ö ENTER)
MENU
ENTER
- Use
×, Ø, Õ and (Ö ENTER) to make a selection and adjustment.
And use (
Ö ENTER) to enter sub-menu. (See Menu Functions for
more details)
- Use
×, Ø, Õ and (Ö ENTER) to make a selection in 16-thumbnail
images and press
to view the selected image..
(4) LIGHT
Switch to turn the overhead light, or base light on or off.
Turn on/off Night View. (5) NIGHT VIEW
Use Night View when you are presenting in a low-light condition.
In Night View, the image of the object appears as though under
the normal lighting conditions. The captured image however,
appears in slow motion.
(6) DELETE
Remove the selected picture permanently in Playback mode.
(7) CAMERA MODE
Switch to Camera mode and display the image from the
AVerVision530’s built-in CCD camera.
(8 ) PC MODE
Switch to PC mode and display the video signal from the RGB input
port.
Switch to Playback mode and toggle to display 16-thumbnail images or
the selected image from the memory source.
(9) PLAYBACK MODE
: To switch to other memory source, AVerVision530 must be in
camera mode then press MENU > ADVANCED > MEMORY
>TYPE > select the source and press (►ENTER) > press
MENU to exit.
(10) CAPTURE
Photograph an image. The captured image is automatically stored in
the memory source at 1024 x 768 resolution.
Lock/unlock Auto White Balance (AWB). (11) AWB/ MEASURE
The camera constantly looks at the overall color of the image
and calculates the best-fit white balance. Each time when the
layout of the captured image changes the color shifts.
To lock the reference point which represent the white, place a
piece of white paper till it fills the screen and wait till the color
temperature is set then press AWB/MEASURE button.
11


