


AXIS M3114-R Network Camera
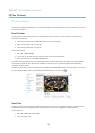
Video
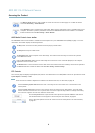
• In the Live View page – select the stream prole from the Stream prole drop-down list.
For quick setup, use one of the predened stream proles. Each predened prole has a descriptive name, indicating its purpose. If
required, the predened stream proles can be modied and new customized stream proles can be created.
To create a new prole or modify an existing prole, go to Setup > Video > Stream Proles.
To select a default stream prole for the Live View page, go to Setup > Live View Cong.
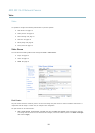
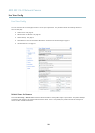
Camera Settings
The Video > Camera Settings page provides access to advanced image settings for the Axis product.
Image Appearance
Increasing the Color level increases the color saturation. The value 100 gives maximum color saturation. The value 0 gives a
black and white image.
The image Brightness can be adjusted in the range 0–100, where a higher value produces a brighter image.
Increasing the Sharpness can increase bandwidth usage. A sharper image might increase image noise especially in low light
conditions. A lower setting reduces image noise, but the whole image will appear less sharp.
The Contrast changes the relative difference between light and dark. It can be adjusted using the slidebar.
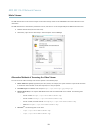
White Balance
White balance is used to make colors in the image appear the same regardless of the color temperature of the light source. The Axis
product can be set to automatically identify the light source and compensate for its color. Alternatively, select the type of light
source from the drop-down list. For a description of each available setting, see the online help
.
Wide Dynamic Range
Wide dynamic range (Dynamic Contrast) can improve the exposure when there is a considerable contrast between light and dark
areas in the image. Enable WDR in intense backlight conditions. Disable WDR in low light conditions for optimal exposure.
Note
This setting is only possible when using automatic exposure control.
Exposure Settings
Congure the exposure settings to suit the image quality requirements in relation to lighting, frame rate and bandwidth
considerations.
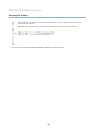
Exposure value - Click in the bar to ne-tune the exposure.
Enable Backlight compensation - Enable this option if a bright spot of light, for example a light bulb, causes other areas in
the image to appear too dark.
Exposure zones - This settings determines which part of the image is used to calculate the exposure. For most situations, the Auto
setting can be used. For particular requirement, select a predened area.
Exposure priority - When Motion is prioritized and maximum Shutter time is set to a small value, motion blur in the image is
minimized. This can be useful for recognition of moving objects such as people and vehicles. However, prioritizing motion may cause
an increase in image noise, especially in low light situations. When Low noise is prioritized and Gain is set to a small value, image
noise is minimized. The le size is reduced, which can be useful if storage space or bandwidth is limited. However, prioritizing low
noise may result in a very dark image, especially in low light situations.
17