


AXIS Q1635 Fixed Network Camera
Video and Audio
- Settings in uploaded applications
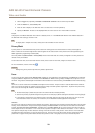
Image Appearance
Increasing the Color level increases the color saturation. The value 100 gives maximum color saturation. The value 0 gives a
black and white image.
The image Brightness can be adjusted in the range 0–100, where a higher value produces a brighter image.
Increasing the Sharpness can increase bandwidth usage. A sharper image might increase image noise especially in low light
conditions. A lower setting reduces image noise, but the whole image will appear less sharp.
The Contrast changes the relative difference between light and dark. It can be adjusted using the slidebar.
Local Contrast applies contrast to a specic area of the image. Use the slider to adjust the contrast, where a higher value produces
an image with high contrast between the dark and light areas.
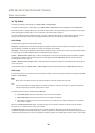
Image Correction
Image correction settings can compensate for different types of image issues. Select Electronic image stabilization (EIS) to
compensate for vibrations or select Barrel distortion correction to compensate for lens effects.
Note
• It is not recommended to use Electronic image stabilization (EIS) together with Wide Dynamic Range (WDR).
• Electronic image stabilization (EIS) cannot be used together with Barrel distortion correction.
Electronic Image Stabilization (EIS)
When monitoring an environment that is subject to vibrations such as a train station, or when the camera is mounted on a pole,
images may appear unsteady. To automatically improve image stability, select Electronic image stabilization (EIS) from Video &
Audio > Camera Settings.
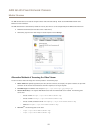
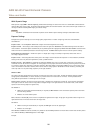
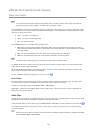
Barrel Distortion Correction
Barrel distortion is a lens effect that causes an image to look curved. The extent of distortion depends on the zoom level.
To edit barrel distortion settings, click Edit from Video & Audio > Camera Settings > Image Correction. In the Barrel Distortion
Correction window, adjust the slider to correct the distortion, using the grid for assistance.
Enable Defog
Enable this feature from Video & Audio > Camera Settings to counter the effects of foggy weather and get a clear image. Or click
the Defog button in the product’s Live View page. This button can be congured to appear in the Live View page from Live View
Cong > Live View Layout. Use the Defog Effect slider to adjust the degree of countering as required.
Note
Too much brightness can negatively impact image quality when defog is active.
White Balance
White balance is used to make colors in the image appear the same regardless of the color temperature of the light source. The Axis
product can be set to automatically identify the light source and compensate for its color. Alternatively, select the type of light
source from the drop-down list. For a description of each available setting, see the online help .
The white balance window is enabled for the Automatic and Automatic outdoor options that appear in the White balance drop-down
list. Select one of the options from the drop-down list to set the white balance window properties. Select Automatic to use the
default settings for the Automatic and Automatic outdoor options (in the White balance drop-down list). Select Custom to manually
set a reference window for white balance in the view area.
24