18
It is used to set the Motion Sensor Area。
7.1 Motion Sensor Area:
Click for the Detection Area
,then use mouse to drag the
motion detection windows on the screen.
7.2 No-Detection Area:
Click for the No-Detection Area
,then use mouse to
drag the area which do not use motion detection.
7.3 Set All:
Click to set all the screen as the
motion detection area.
。
7.4 Clear All:
Click to set all the screen as the
non motion detection area.
。
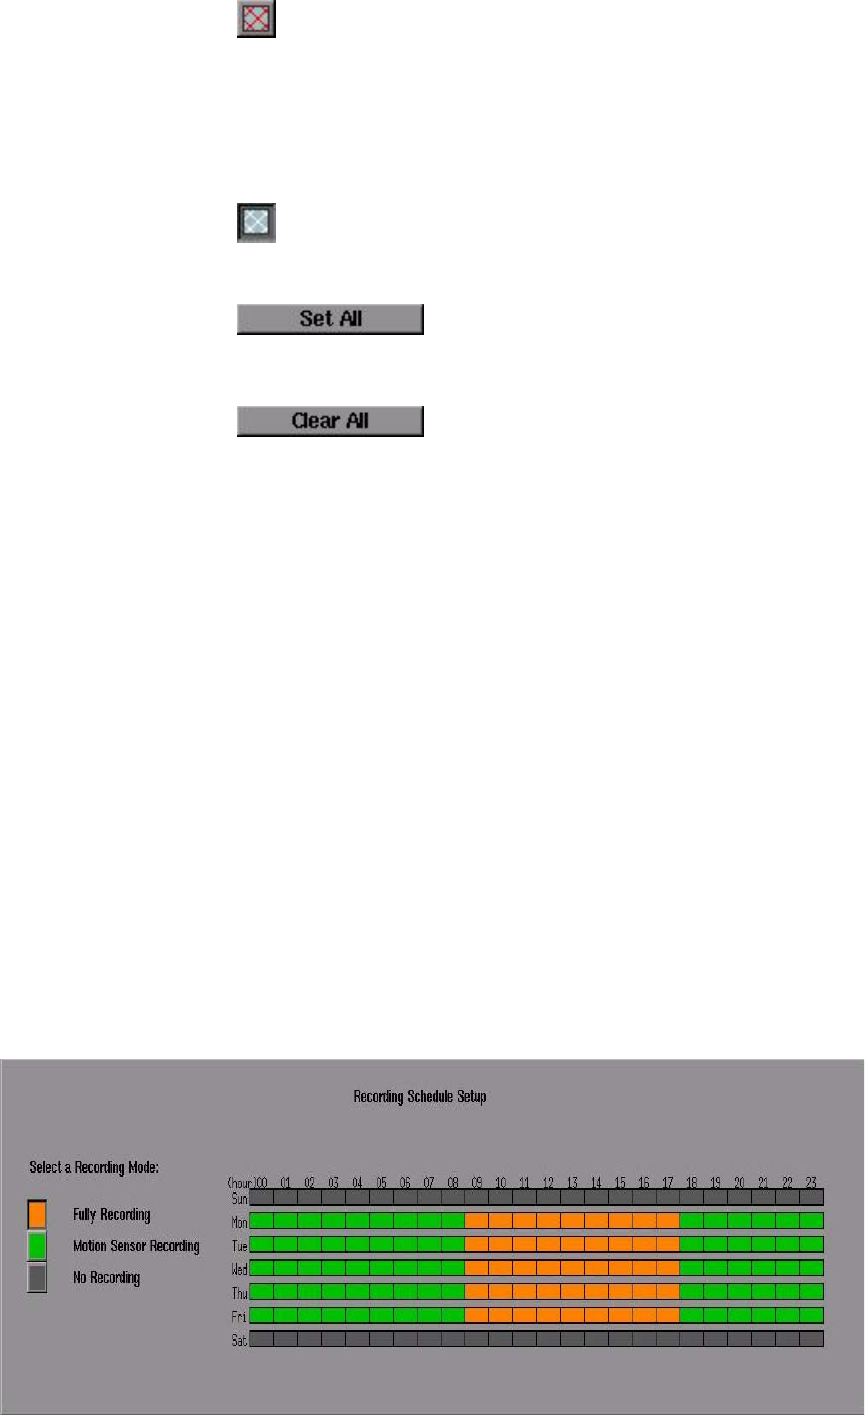
8. Recording Schedule Setup:
Refer to the Recording Schedule Table below. There are 7 rows and 24
columns in the schedule table, which represents 7 days and 24 hours.
There are three Recording Mode
,
1.
Fully Recording.
2.
Motion Sensor Recording.
3.
No Recording.
First, you could choose the Recording Mode button on the left of the schedule
table, then use mouse to drag the area on the table for each recording mode.
