


20 21
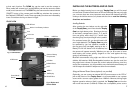
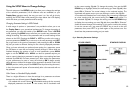
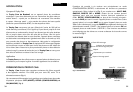
Using the tripod socket: The camera is equipped with a socket at the
bottom end to enable mounting on a tripod or other mounting accessories
with a standard1/4-20 thread.
Two optional mounting accessories, a “Bear Safe” metal camera box
(model # 19653C) and Deluxe Tree Bracket (model# 119652C) are also
available-please see your Bushnell dealer or website for more details.
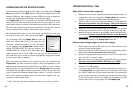
Sensing Angle and Distance Test
To test whether the Trophy Cam can effectively monitor the area you
choose, this test is recommended to check the sensing angle and monitoring
distance of the Trophy Cam. To perform the test:
• Switch the Trophy Cam to the SETUP mode.
• Make movements in front of the camera at several positions within
the area where you expect the game or subjects to be. Try different
distances and angles from the camera.
• If the motion indicator LED light blinks, it indicates that position can be
sensed. If it does not blink, that position is outside of the sensing area.
The results of your testing will help you find the best placement when
mounting and aiming the Trophy Cam. The height away from the ground for
placing the device should vary with the animal size appropriately. In general,
3 to 6 feet is preferred.
You can avoid potential false triggers due to temperature and motion
disturbances in front of the camera by not aiming it at a heat source or nearby
tree branches or brush (especially on windy days).
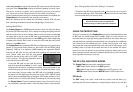
Switching ON the Camera
Once you switch to the ON mode, the motion indicator LED (red) will blink
for about 10 seconds. This gives you time to close and lock the front cover of
the Trophy Cam and then walk away. During this time, the motion indicator
LED will blink red continuously. After it stops blinking, the PIR is active, and
any motion that is detected by it will trigger the capture of photos or videos
as programmed in the SETUP Menu. Be sure you have read the descriptions
of the Capture Number, Video Length, Interval and Sensor Level parameters.
Please note, the PIR is strongly sensitive to ambient temperature. The greater
the temperature difference between the environment and your subject, the
farther the possible sensing distance. The average sensing distance is about
45 ft.
Before leaving the camera unattended, please check for the following:
• Are the batteries or DC power supply inserted/connected with correct
polarity and is the power level is sufficient?
• Does the SD card have sufficient available space and is its write-
protection (lock) switch off?
• Is the Power switch in the ON position? (do not leave it in SETUP).
PLAYING BACK/DELETING THE PHOTOS/VIDEOS
After you have setup, mounted and activated your Trophy Cam, you will of
course be eager to return later and review the images it has captured for
you. There are several different ways this can be done.
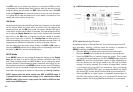
Reviewing Images on the Trophy Cam LCD (Models with Color Viewer only)
• Put the power switch in SETUP mode (switch to OFF first).
• Push the OK(Replay) key to enter image review mode.
• Use the UP/DOWN keys to scroll through your photos or videos. The
right corner of the display will indicate “JPG” for still photos, and a film
icon for video files. Press the RIGHT(Shot) key to review a video.
• Push MENU to delete an image. Image delete mode works as
described below. To exit image review mode, press the OK key.
Reviewing Images on an External Video Monitor
A TV monitor can also be used to play back pictures (or videos) from the
device. Connect a TV monitor or a viewing device (such as a digital picture
frame) that has a standard composite video input (RCA jack) to the Trophy
Cam ‘s “TV Out” mini jack using the supplied cable. Then:
• Put the power switch in SETUP mode (switch to OFF first).
• Press the OK key. The most recently captured image will be shown