


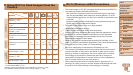


116
1
2
3
4
5
7
8
9
Preliminary Notes and
Legal Information
Contents: Basic
Operations
Camera Basics
Auto Mode/Hybrid
Auto Mode
Other Shooting
Modes
Playback Mode
Setting Menu
Accessories
Appendix
Index
Basic Guide
P Mode
Cover
Advanced Guide
6
Wi-Fi Functions
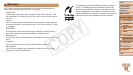
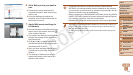
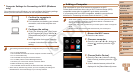
4 Use the smartphone to connect
to the network displayed on the
camera screen.
Choose the displayed SSID (network
name) from the smartphone’s Wi-Fi
setting menu.
Enter the encryption key displayed on the
camera screen into the password eld on
the smartphone.
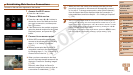
5 Start CameraWindow on the
smartphone.
Once the smartphone is recognized on
the camera, the device connection screen
will be displayed on the camera.
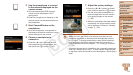
6 Choose a smartphone to
connect to.
Press the <o><p> buttons to choose
the smartphone for the connection, and
then press the <m> button (=
115).
7 Adjust the privacy settings.
Press the <q><r> buttons to choose
[Yes], and then press the <m> button.
You can now use the smartphone to
receive images sent from the camera,
or to geotag images on the camera
(=
129).
When the smartphone has been added
successfully, the image transfer screen
will be displayed. Proceed to “Sending
Images” (=
126).
•When you are in the vicinity of an access point that you have
previously connected to, the camera will automatically connect
to it in step 3. To change access points, select [Switch Network]
from the screen that will be displayed when the connection is
being established, and follow steps 4 – 5 in “Adding a Computer”
(=
121).
•All camera images can be viewed from the connected smartphone
when you choose [Yes] in step 7. To keep camera images private,
so that they cannot be viewed from the smartphone, choose [No] in
step 7.
C OPY