


123
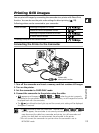
Direct Printing
E
Setting the Print Style
❍ Print setting options and [DEFAULT] settings vary depending on the printer
model. For details, refer to the instruction manual of your printer.
❍ [8-UP] can be selected when using card size paper (5.3 × 8.6 cm) with CP
Printers.
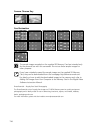
❍ [BORDERED]: The image area remains relatively unchanged from the recorded
image when it is printed. [BORDERLESS]/[8-UP]: The center portion of the
recorded image is printed at an enlarged size. The image’s top, bottom and
sides may be cropped slightly.
❍ Date print cannot be selected with the CP Printers CP-200 and CP-300.
❍ [VIVID], [VIVID+NR] and [NR] can be selected with Canon Bubble Jet Printers.
❍ With CP Printers, make sure to select the paper size of the attached paper
cassette.
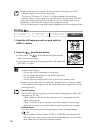
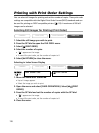
Paper Settings
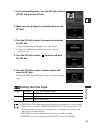
1. In the print setting menu, turn the SET dial to select
[PAPER] and press the SET dial.
2. Turn the SET dial to select the paper size and press
the SET dial.
Select the paper size of the paper set in your printer.
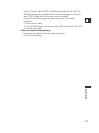
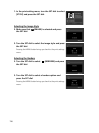
3. Turn the SET dial to select the paper type and press
the SET dial.
Select the paper type of the paper set in your printer.
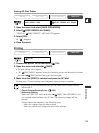
4. Turn the SET dial to select a layout option and press
the SET dial.
PAPER PAPER SIZE Available paper sizes vary depending on the printer model.
PAPER TYPE PHOTO, FAST PHOTO, DEFAULT
PAGE LAYOUT BORDERLESS, BORDERED, DEFAULT, 8-UP
Date print ON, OFF, DEFAULT
Print effect (Image Optimize)
ON, OFF, VIVID, NR, VIVID+NR, DEFAULT
6_D82NTSC_E(119-129) 1/30/04 14:38 Page 123