


Using the Remote Controller
38
Menus
Table of Contents Index
Using the Remote Controller
The camcorder can be operated remotely. You can use the supplied remote controller as described in this
section. You can also use the camcorder’s network functions and wirelessly connect a compatible device to
control the camcorder. For details about wirelessly controlling the camcorder, refer to
Browser Remote:
Controlling the Camcorder from a Network Device
(A 127).
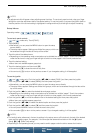
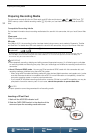
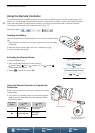
Inserting the Battery
Insert the supplied lithium button battery into the remote controller before
use.
1 Press the tab in the direction of the arrow (ቢ) and pull out the battery
holder (ባ).
2 Place the lithium button battery with the + side facing up (ቤ).
3 Insert the battery holder (ብ).
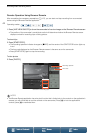
Activating the Remote Sensor
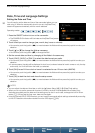
1 Press the MENU button.
2 Open the [Wireless Remote Control] submenu.
[ System Setup] > [2] (in mode) or [1] (in mode) >
[Wireless Remote Control]
3 Select [i On] and then touch [X].
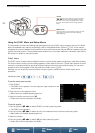
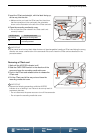
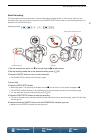
Using the Remote Controller to Operate the
Camcorder
When using the remote controller, point it at the camcorder’s
remote sensor.
• The position of the delay switch on the remote controller
determines how the remote controller operates. Refer to
the following table.
Operating modes:
Delay switch
position
mode mode
2
Starts and stops
recording a video clip.
Takes a photo after a
2-second delay.
‹
Takes a photo, even
while recording video
clip.
Takes a photo
immediately.
ብ
ባ
ቢ
ቤ
[ System Setup]
[2] (in mode) or
[1] (in mode)
[Wireless Remote Control]
[j Off ]
Remote sensor
Delay switch (bottom side
of remote controller)