


77
Customization
E
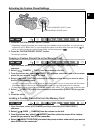
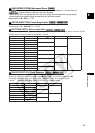
Activating the Custom Preset Settings
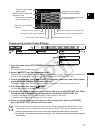
1. Press the CUSTOM PRESET SELECT button.
• Repeatedly pressing the button will cycle through the available custom preset files. You can also set a
custom key as [CP BKWD KEY] to cycle through the options in reverse order (from last to first) ( 66).
• When you are not using the custom preset setting, set the camcorder to .
2. Press the CUSTOM PRESET ON/OFF button.
The setting is activated.
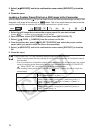
Copying a Custom Preset File to the Memory Card
1. Open the menu, select [CUSTOMIZE] and then select the [CUSTOM PRESET]
submenu.
2. Select [ CAMERA CARD] from the column on the left.
3. From the bottom bar, select [ SELECT CP] and then select the name of the custom
preset file you want to copy to the card.
4. Select [ SAVE POSITION] and select the filename under which you want to store
the file on the memory card.
• Up to 20 custom preset files can be stored on the memory card. If you try to save more than 20 custom
preset filed one of the files on the card will be overwritten (you can select which file to overwrite).
• If there are no custom preset files saved on the memory card, “NEW_FILE” will be used as the file name.
5. Select [ EXECUTE] and in the confirmation screen select [EXECUTE] to copy the
file.
6. Close the menu.
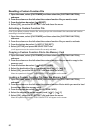
Loading a Custom Preset File from the Memory Card
1. Open the menu, select [CUSTOMIZE] and then select the [CUSTOM PRESET]
submenu.
2. Select [ CARD CAMERA] from the column on the left.
3. From the bottom bar, select [ IMPORT] and then select the name of the custom
preset file you want to load to the camcorder.
4. Select [ SELECT POSITION] and select the preset number under which you want to
store the file in the camcorder.
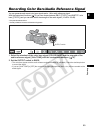
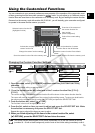
CUSTOM PRESET ON/OFF button
CUSTOM PRESET SELECT button