


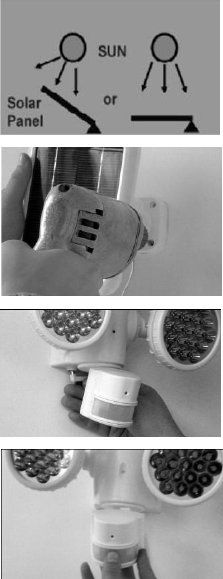
3) Find a location for the solar panel that
receives direct sunlight for a minimum of
4-6 hours a day and within 15’ of where the
solar light will be installed.
4) Place the solar panel in desired location
and secure with screws.
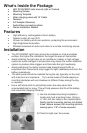
5) Completely insert the cable plug from the
solar panel into the INPUT hole located at
the bottom of the light.
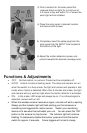
6) Adjust the motion detection sensor and
camera towards the desired coverage area.
Functions & Adjustments
OFF: No illumination; no camera. Product will be completely off.
AUTO: Initial 5 minutes is testing mode. The lamp and camera turn on
when the switch is in Auto mode, the light and camera will operate in test
mode when motion is detected. After initial 5 minutes test mode, the light
and camera will only work at night when the motion detector is activated.
ON: In this mode, LED lamps will always be on. If no infrared signal is
detected, camera will turn off.
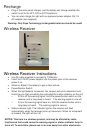
When the wireless receiver receives a signal, a buzzer will emit a warning
(Beep) and the indicator light will flash alerting you that someone or
something has triggered the motion sensor. Switch your monitoring
device on to see what has activated your unit. You can press the “ON”
button on the receiver to stop buzzer. The indicator light will continue
flashing. To temporarily disable the buzzer, press and hold the buzzer
switch for approx. 2 seconds. Future triggers will not emit a beep.