


Page 6Page 5
Accessing the DVR menus
2
Setup
A
A1
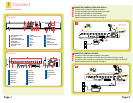
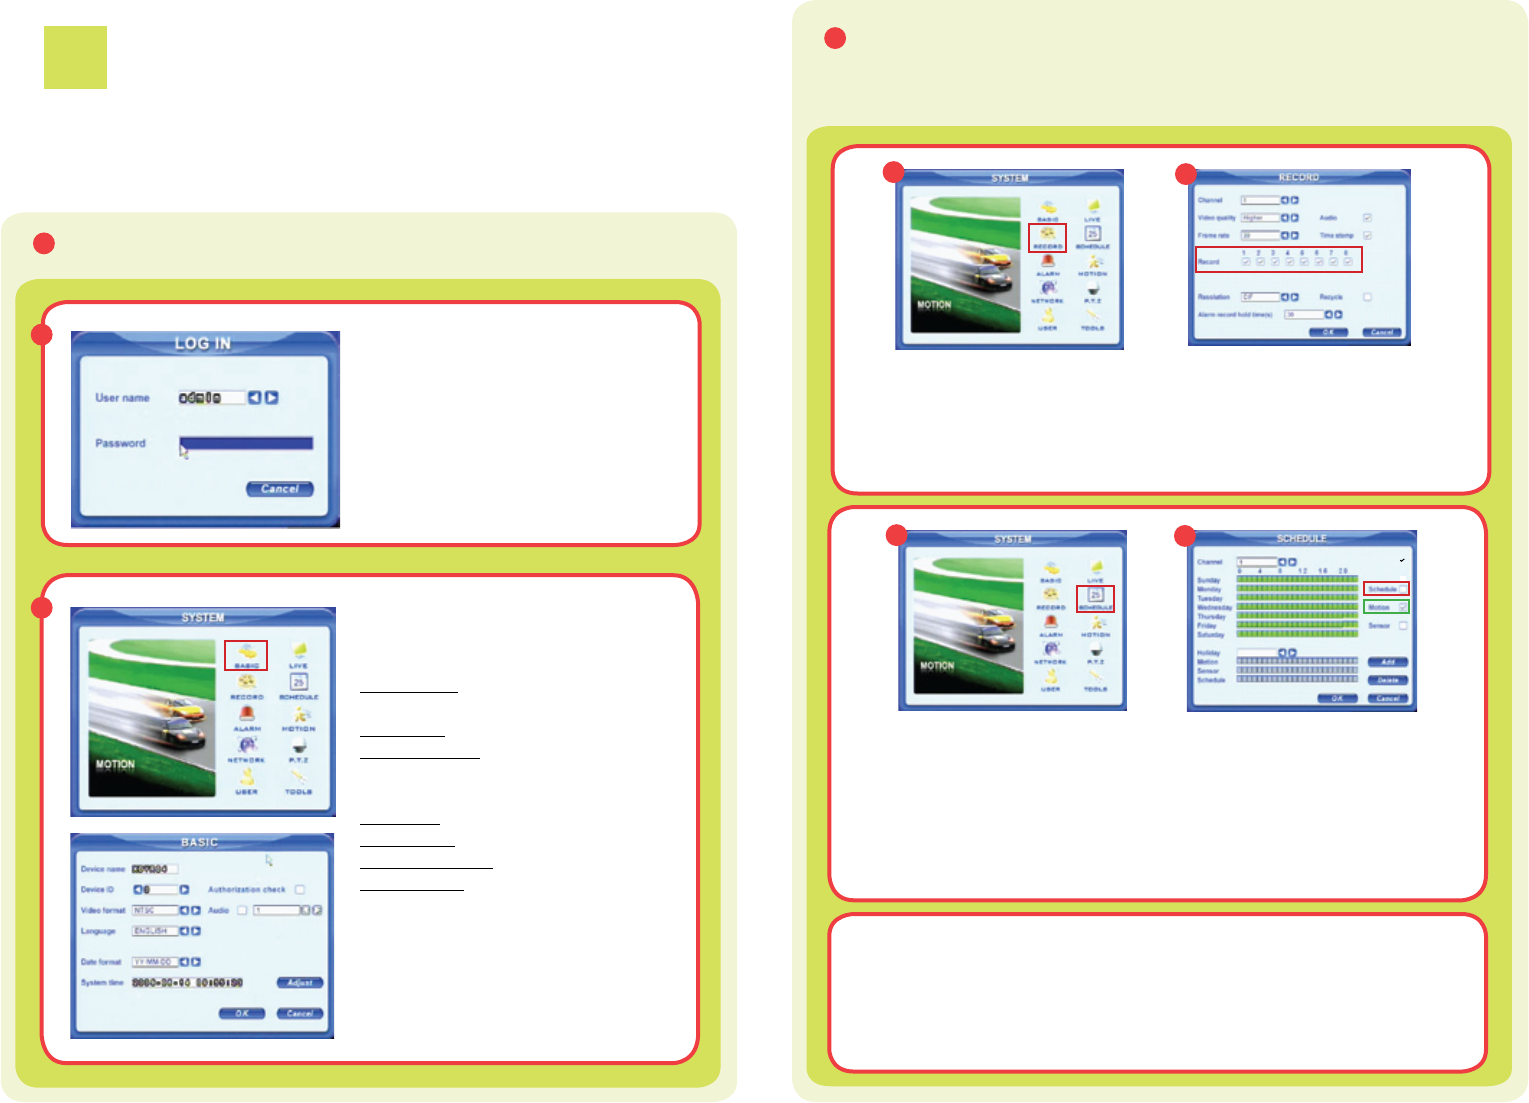
Press the MENU key on the DVR front
panel, which will display the LOGIN
SCREEN (A1). Enter the default user
name: admin, and password: 123456.This
will display the SYSTEM SCREEN (A2).
Use the direction keys to move the cursor
and the ENTER key to select.
To navigate through the DVR menu, three options are available:
1. DVR Front Panel: Use the DIRECTION keys to move the cursor and the
ENTER key to select
2. Remote Control
3. USB Mouse (included)
B
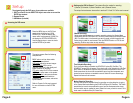
A2
The system screen offers the following
setup features:
BASIC option: set time, date, enable
audio and password check.
LIVE option: adjust the camera images
RECORD option: (B2) to set up
resolution, frame rate, video quality and
enable cameras for recording.
PTZ option: setup Pan-Tilt-Zoom cameras
USER option: setup users on the system
NETWORK option: setup remote access
TOOLS option: to access hard drive
information, update firmware, and restore
system defaults.
Refer to Chapter 3 of the user’s manual
for more information on the SYSTEM
menu.
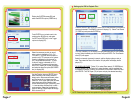
Manual Recording:
Setup and enable the cameras you want to record by going to the System Menu
and selecting the RECORD option (B1, Red Box) this will display the Record Screen
(B2). Put check marks in the cameras you want to record, and set the quality and
frame rate you prefer for each camera. Push the RECORD button on DVR to start
recording. Push the stop button to stop recording.
Setting up the DVR to Record: This system offers four modes for recording:
1) Manual, 2) Schedule, 3) Motion Detection, and 4) External Sensor.
For setup of external sensor alarms refer to sections 2.3.2 and 3.3.5 of the user’s manual.
Time Schedule Recording:
Go to the System Menu and select the SCHEDULE option (B3, Red Box). The
SCHEDULE screen (B4) will appear. Put a check mark in the Schedule box (B4, Red
Box). Select or de-select the Days and Hours you want the cameras to record. The
Green area shows the hours that are enabled to record, and the transparent area
shows the hours which are not enabled to record. Select OK to save the settings.
Repeat this feature for all cameras.
B2
B3
B4
B1
Motion Detection Recording:
You must first setup the days and times for recording on motion detection, by going
to the System Menu and selecting the SCHEDULE option (B3, Red Box). The Green
area shows the hours that are enabled to record, and the transparent area shows
the hours which are not enabled to record. Select the hours you wish to record. Put a
check mark in the Motion Box (B4, Green Box).