


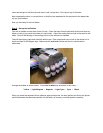

Step 9 – Testing the System
Push the cartridges to the far right and reattach the printer power. Turn on the power on the front of the
printer if needed. Have you computer and graphics program up an ready to go.
The printer should come on and move back an forth a few times and do a cleaning cycle. When it stops
moving, only the green light should be on.
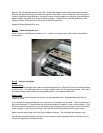
A red light at this point is not a good thing. It indicates the one of the cartridges is not seated all the way
down. Go back to Step 6 and make sure that all the cartridges have seated properly. Lift them just
slightly, if needed and reseat them.
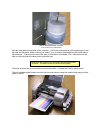
After the cleaning cycle is over, bring up an image on your favorite graphics program and get set to make
a print. Be sure to put paper in the printer. Before printing, use the printer properties and Epson utilities
to check the nozzles. The nozzle pattern may not be perfect at this point.
Run 3 or 4 cleaning cycles if necessary to achieve a perfect nozzle pattern. When all the nozzles are
present, make a print. You should now see ink coming up the tubes. As long as the print is satisfactory
and all the nozzles are present, there is no need to do any further cleaning cycles.
Don’t worry about the inks, it will take several (20 or more) prints for the inks to reach the cartridge. There
is no particular order in which they will get there.
Maintenance Suggestions
• Try to make a print every day to keep the system fresh. These systems do not like to be left for
days at time without printing.
• Don’t let your ink levels get below 1/4 empty. Add additional ink when this happens. The tube
can be lifted out of the ink to add more. Don’t leave the tube out of the ink for a long period of
time. The cartridge can drip ink into the printer when the tube is out, but it happens slowly.
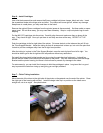
• Once you have installed the cartridges, do not lift them up. Lifting up the cartridges lets air into
the ink inside the cartridge and it can become foamy. Foamy ink will not print.
• After you do cleaning cycles or after the printer has been off and then turned back on, the Auto
Reset chips on the cartridges will reset themselves to full. When this happens, you have to
acknowledge a message from Epson indicating that the chips are not authentic Epson chips.
Just click the YES button to continue.
• If you get a red light when printing. Shut the printer off, cancel your print job and wait 10
seconds. Then turn the printer power back on, the Auto Reset chips will reset themselves back
to full and you can continue printing.
For additional technical assistance, visit the MIS website troubleshooting guide ….
http://www.inksupply.com/index.cfm?source=html/cobratrouble.html