INSTALLATION
6
Pass the power cable/day-night cable
(G)
and video cable
(H)
from the camera unit through the cable hole in the ceiling.
(Power cable/day-night cable)
7
Align the four screw holes in the camera unit
(C)
with the screw
holes in the ceiling, and then secure the camera in place by
tightening the screws.
8
Carry out the settings and adjustments for the camera.
Refer to p. 6 for camera settings and adjustments, and to p. 11
for lens adjustments.
9
If the dome liner is secured in place, loosen the screw
(I)
.
Adjust the dome liner
(J)
so that the dome camera’s lens is visible
from the camera window
(K)
, and then use a hexagon wrench to
fix the dome cover.
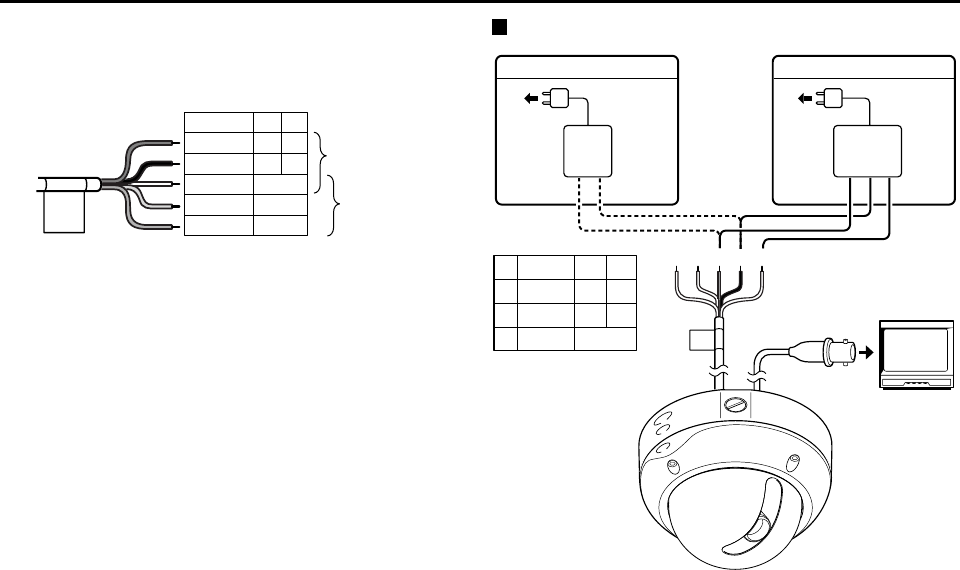
Connections
RED
Cable
BLACK
WHITE
YELLOW
PURPLE
GND
COLOR
B/W
+~
~
–
DC12 AC24
Power cable
Day/night
cable
AC 24 V connection
DC 12 V connection
1
1
RED
Cable
BLACK
WHITE
GND
2
3
23
+
+~
~
–
–
~~
GND
DC12 AC24
L5AK4/US, L5AL4/US GB 2003, 6, 6
English
5


