67
Viewing Images
6
66
6.1 CAMERA CONNECTION
6
Viewing
Images
Do not connect the AC power adapter to charge the
AA-size Ni-MH (nickel-metal hydride) batteries. Use
the optional charger (➡P.77) to charge the Ni-MH
batteries.
Check that the camera is off. Plug the AC power
adapter connector into the “DC IN 3V” socket and
then plug the AC power adapter into the power
outlet.
●
!
The socket-outlet shall be installed near the equipment and
shall be easily accessible.
●
!
The shape of the plug and socket-outlet depends on the
country of use.
DC IN 3V socket
AC-3VX
(sold separately)
Always use the FUJIFILM “AC Power Adapter AC-3VX” (sold separately) (➡P.77).
Use the AC power adapter to prevent losing power at inconvenient times, such as when
downloading photographed images to your PC. You can take pictures and play back images without
worrying about depleting the batteries.
●
!
See P.79 for notes on using the AC power adapter.
●
!
Only connect or disconnect the AC power adapter when the camera is off.
Connecting or disconnecting the AC power adapter while the camera is on temporarily interrupts the power supply to the
camera, so that images or movies being shot are not recorded. Failing to turn the camera off first can also result in
damage to the xD-Picture Card or malfunctions during PC connection.
6.1.1 Using the AC power adapter
Turn off the camera and TV. Plug the A/V cable
(included) into the “A/V OUT” (Audio/Visual output)
socket.
Plug the other end of the cable into the video/audio
input socket on the TV. Then turn the camera and
TV on and take pictures or play back images
normally.
●
!
When there is a power outlet available, connect the AC
Power Adapter AC-3VX.
●
!
When connecting the A/V cable to TV, the LCD monitor is
turned off.
●
!
Refer to the instructions provided with your TV for more
information on video/audio input for your TV.
●
!
The image quality for movie playback is lower than for still
images.
6.1.2 Connecting to a TV
A/V OUT
(Audio / Visual output)
socket
DC IN 3V socket
1
2
Video (yellow)
Audio (white)
To terminals
AC-3VX
(sold separately)
USB socket (mini-B)
2
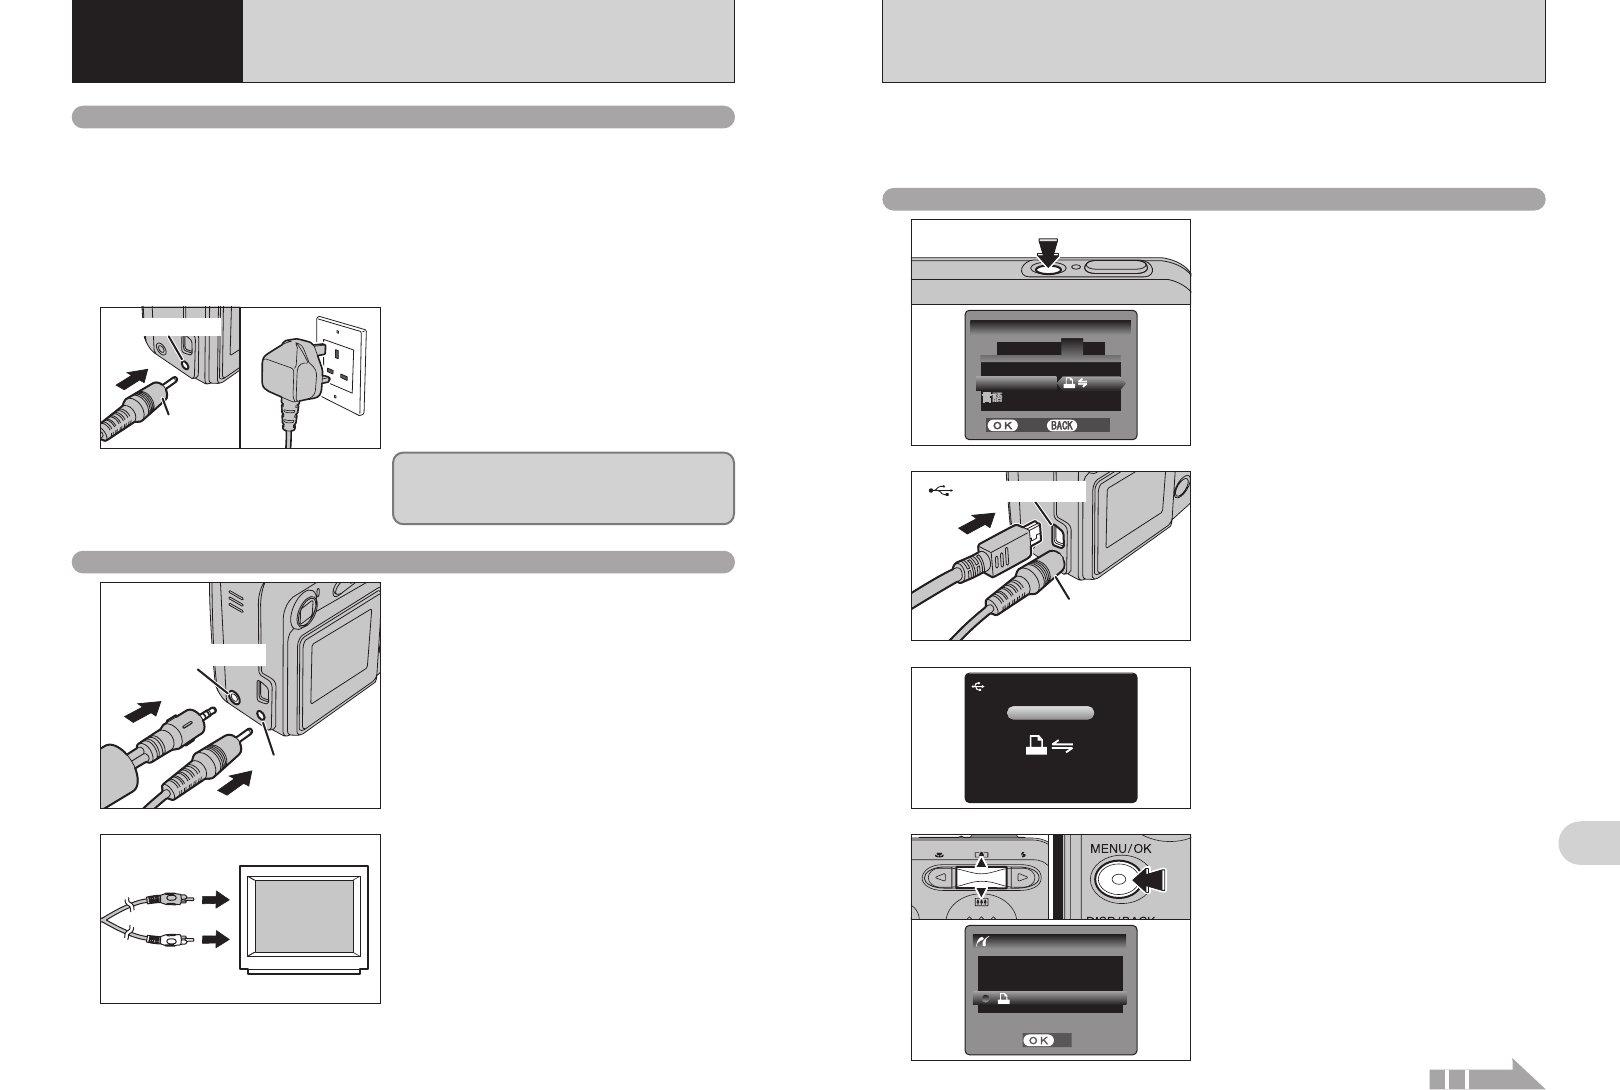
1Connect the camera to the printer using the USB
cable (mini-B).
2Turn the printer on.
3
1Set the Mode switch to “w”.
2Press the “POWER” button to turn the camera
on.
“s” appears and then the menu is
displayed on the LCD monitor.
●
!
If the menu does not appear, check whether the “USB
MODE” setting is
“®”.
●
!
Depending on the printer, some functions are disabled.
●
!
The camera cannot be used to specify printer settings such
as the paper size and print quality.
●
!
Please connect the AC Power Adapter AC-3VX (sold
separately) to your camera.
●
!
Use an xD-Picture Card that was formatted on the camera.
1Press the “POWER” button to turn the camera
on.
2Select “®” in “USB MODE” in the “SET-UP”
menu (➡P.52).
3Press the “POWER” button to turn the camera
off.
●
!
Do not connect to a PC when the “USB MODE” setting is set
to “
®”. See P.85 if you connect to a PC by mistake.
1
/ LAL A NGN G .
USBU S B MODEM OD E
: ENGE N G LIL I SHS H
SES E T
-
UPU P
: CONC O N T.T.
4
1 2 3 5
SETS E T
CANCELC A N C E L
FRAMEFR A M E N O.O .
0103
02
4
1Press “a” or “b” to select “u PRINT DPOF”.
2Press the “MENU/OK” button.
●
!
When “d ” appears, the DPOF settings are
not specified.
●
!
To use DPOF printing, the DPOF settings must be specified
on FinePix A360 / FinePix A370 beforehand (➡P.39).
●
!
Even when “WITH DATE” is specified in the DPOF settings,
the date is not inserted on printers that do not support date
printing.
P R I N T W I T H D A TET E
P R I N T W I T HOUTH O U T D A TET E
P R I N T DPOFD P O F
P I C T B R I DGD G E
SETS E T
01 02
CHECC H E C K I NGN G USBU S B
USBU S B
When a printer that supports PictBridge is available, images can be printed by connecting the
camera directly to the PictBridge-compatible printer without using a PC.
●
!
In PictBridge function, images photographed on other than a camera may not be printed.
6.2
CONNECTING THE CAMERA DIRECTLY TO THE PRINTER
—
PictBridge FUNCTION
6.2.1
Specifying images for printing on the camera
Continued


