


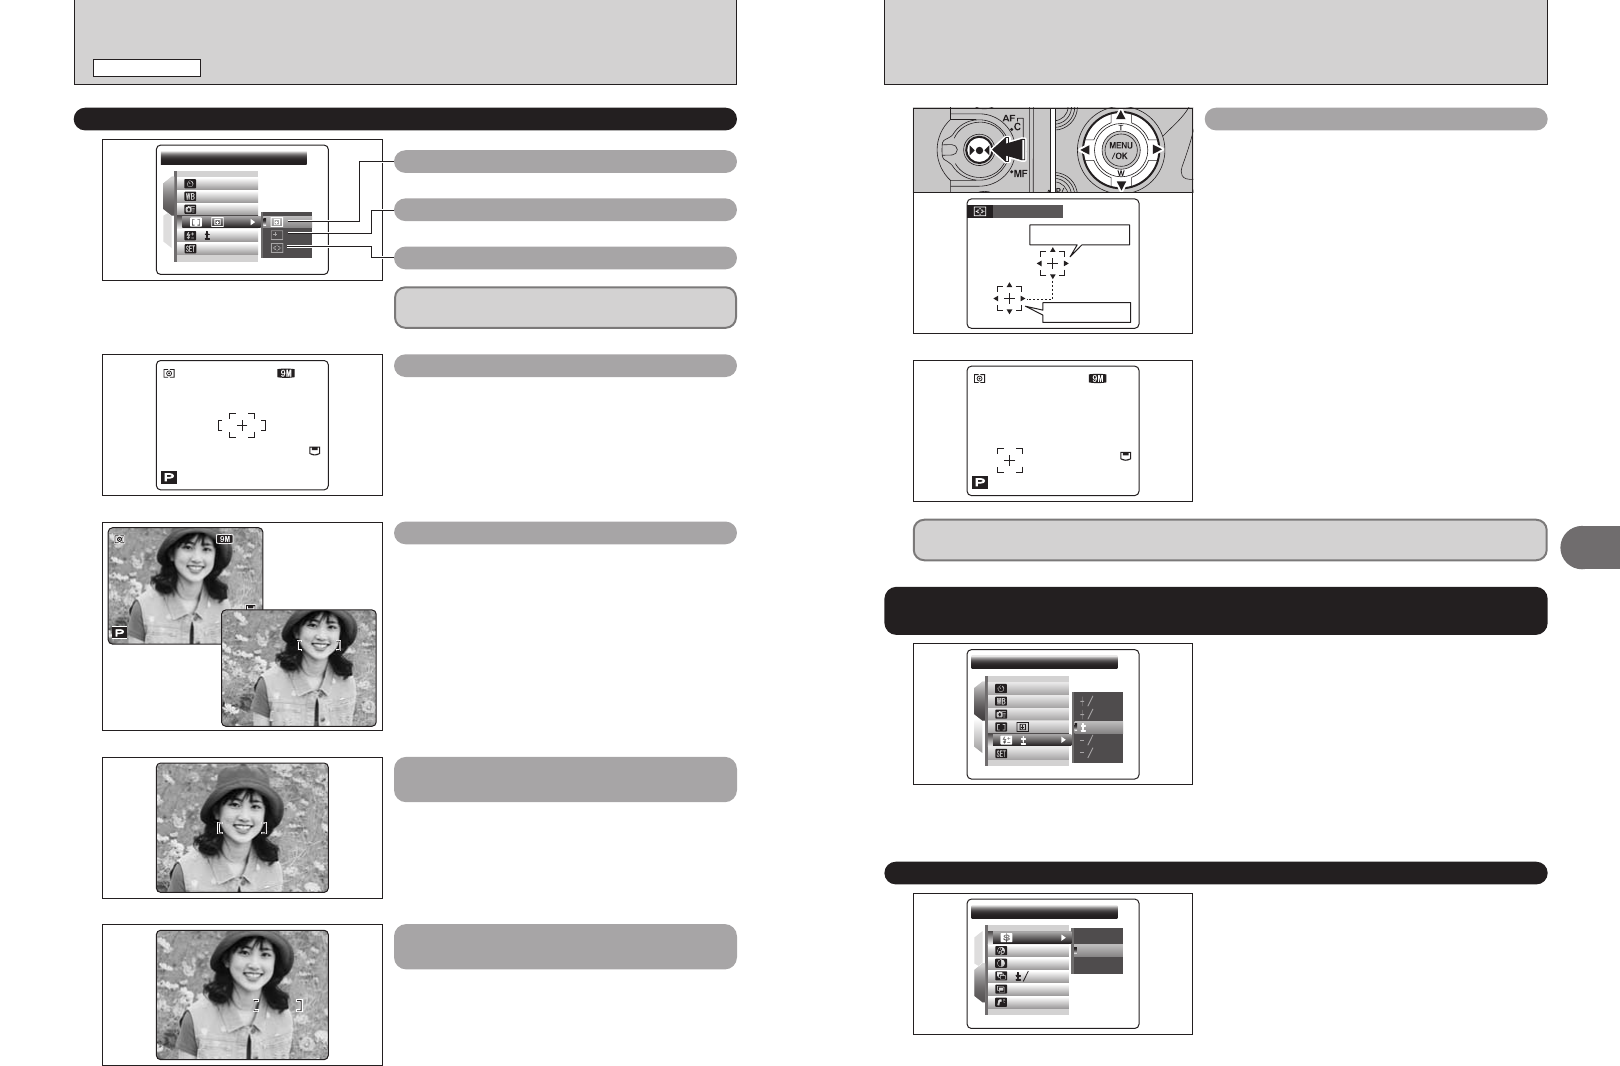
AF MODEAF MODE
AUTOAUTO
SETSET
1
2
:
OFFOFF
OFFOFF
0
:
:
:
:
:
68 69
Advanced Features
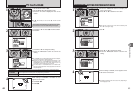
3
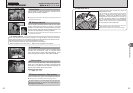
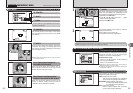
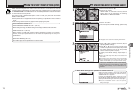
˝ MULTI
Press the shutter button down halfway. The camera
recognizes any strongly contrasting subject near
the center of the screen and displays the AF frame
over the subject in focus.
●
!
When taking pictures in Macro mode, the camera focuses on
the center of the screen.
320320320320 F5F5.6F5.6F5.6
ISO
200
ISO
200
ISO
200
66
NNN
320320320320 F5F5.6F5.6F5.6
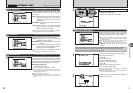
Ï CENTER
The camera focuses on the center of the screen.
Use this setting when taking pictures using AF/AE
lock (➡P.28).
320320320320 F5F5.6F5.6F5.6
ISO
200
ISO
200
ISO
200
66
NNN
320320320320 F5F5.6F5.6F5.6
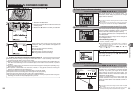
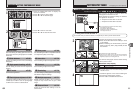
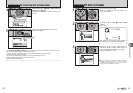
Press the shutter button down halfway. The AF
frame appears positioned on the high-contrast
subject near the center of the image.
For a high-contrast subject in
the center of the screen
320320320320 F5F5.6F5.6F5.6
When the camera has difficulty focusing on the
subject in “MULTI” mode, set the AF mode to
“CENTER” and use AF/AE Lock (➡P.28).
When there is no high-contrast
subject in the center of the screen
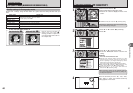
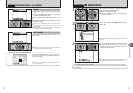
PHOTOGRAPHY MENU
PHOTOGRAPHY MENU
H
AF MODE
Available Photography modes: N, M, <, >
✽ Displaying the menus (➡P.63)
Before moving
After moving
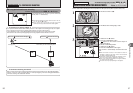
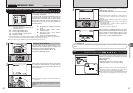
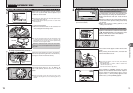
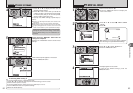
SELECT AF AREASELECT AF AREA
2
The AF frame appears in the location to which the
target point was moved.
Take the picture in the normal way.
To reposition the AF frame, repeat step 1.
320320320320 F5F5.6F5.6F5.6
ISO
200
ISO
200
ISO
200
66
NNN
1
Ë AREA
The camera changes the focusing position on the
screen. Use this setting when composing the shot
using a tripod and changing the focusing position.
1Hold down the“—” button.
2Press “a”, “b”, “d” or “c” to move the “°” (target
point) to the focusing position.
3Release the“—” button.
01 0203
Regardless of the AF frame location, the exposure is always set using the area in the center of the
screen. To expose the shot for your main subject, use AE lock.
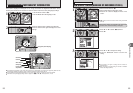
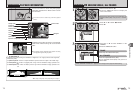
Use this setting to change the amount of light
emitted by the flash to suit the photography
conditions or to achieve a desired effect.
hCompensation range:
–2/3 EV to +2/3 EV in approx. 1/3 EV increments
(total: 5 levels selectable)
See P.137 for information on EVs.
●
!
Depending on the type of subject and the shooting distance,
brightness adjustment may have no effect.
●
!
The image may appear dark when setting the shutter speed
to higher than 1/1000 sec.
FLASHFLASH
AUTOAUTO
SETSET
1
2
OFFOFF
OFFOFF
22
33
11
33
11
33
22
33
0
0
:
:
:
:
:
:
Ô
FLASH BRIGHTNESS ADJUSTMENT
Available Photography modes: N, M, <, >
The AF mode can only be selected when the focus
mode is S-AF (➡P.23).
Ë AREA
˝ MULTI
Ï CENTER
Use this setting to soften or emphasize outlines or
to adjust the quality of the image.
HARD: Emphasizes the outlines.
Best for shots of subjects such as buildings
or text where sharp images are desirable.
STANDARD: Best for ordinary photography.
Provides edge sharpness that is ideal
for most picture taking situations.
SOFT: Softens the outlines.
Best for shots of subjects such as people,
where a softer image is desirable.
SHARPNESSSHARPNESS
1
2
EVEV
OFFOFF
OFFOFF
HARDHARD
STDSTD
SOFTSOFT
STDSTD
STDSTD
STDSTD
1
3
:
:
:
:
:
:
G
SHARPNESS
Available Photography modes: N, M, <, >