57
4
56
32
➀
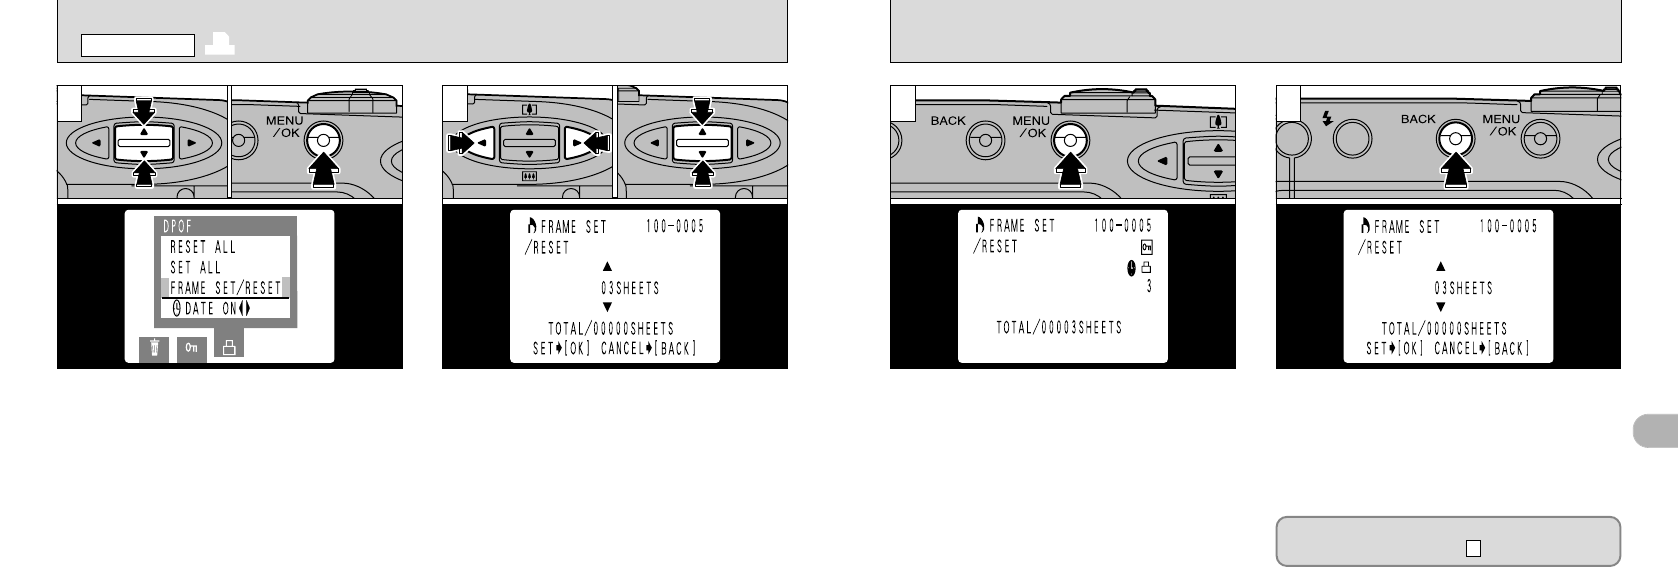
Use the “d” or “c” button to display the frame
for which you want to specify DPOF settings.
➁
Use the “ab” button to specify the number of prints.
●
!
If you do not want a print of the frame, reset the
number of prints to “00”
●
!
The setting is not saved until you press the “d” or
“
c” button to move to another frame or press the
“MENU/OK” button.
●
!
You can specify up to 99 prints for each frame.
Prints can be specified for up to 999 frames on the
same SmartMedia.
<To Continue>
When you have completed the settings, always
press the
“
MENU/OK” button to confirm the
settings. The total number of prints is displayed on
the LCD monitor and then the menu screen
reappears. The “R” icon and the number of prints
are displayed for frames with DPOF specifications
and the “T” icon is also displayed if the date is set.
1
➀
Use the “ab” button to select “FRAME SET/
RESET”.
➁
Press the “MENU/OK” button.
●
!
Always select whether or not to print the date or time
before specifying the DPOF setting.
●
!
If you use “FRAME SET” and then use “SET ALL”,
the number of prints specification in “FRAME SET”
is cancelled.
●
➀
●
➁
●
➀
●
➁
To use “FRAME SET/RESET” again, repeat
the procedure from step .
2
<To Cancel>
Pressing the “BACK” button cancels only the
settings for the currently selected frame. The
settings for other frames are not cancelled.
4
R DPOF SET/RESET FRAME
PLAYBACK MENU
●
!
“TOTAL” shows the total number of prints specified.


