


6
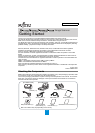
Conditions and precautions for using the
cables are as follows:
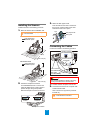
zUSB cable
-Use the supplied USB cable.
-When connecting to a USB hub, make sure
to use the USB hub that is connected to the
USB port of the computer.
-If you connect the scanner with USB 2.0, it
is required that the USB port and the hub be
compliant with USB 2.0. The scanning
speed slows down when you connect the
scanner with USB 1.1.
-Connect it with the
USB mark facing up.
zSCSI cable
-SCSI cable and SCSI card need to be
purchased separately.
SCSI cable
A 50-pin half-pitch connector is required on
the scanner side, and the other end of the
cable must fit the SCSI card connector on
the computer.
SCSI card
Use one of the recommended SCSI cards
from the following website:
http://www.fujitsu.com/
-In a SCSI daisy chain formation, connect
the scanner so that it is the last device on
the chain.
-Be careful not to damage the connector pins
when connecting to the computer.
-The SCSI ID is set to "5" at factory default. If
the same ID is used by another device, dial
the SCSI ID switch to a different setting.
0 to 7: Available
8, 9 : Set to factory default (SCSI ID=5)
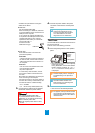
3. Connect the AC cable to the AC adapter
(hereinafter called the "power cable").
4. Connect the power cable to the power
connector of the scanner and the power
outlet.
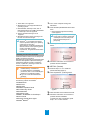
Test-Scan
Use ScandAll PRO to confirm that documents can
be scanned correctly.
Perform a test in the following procedure.
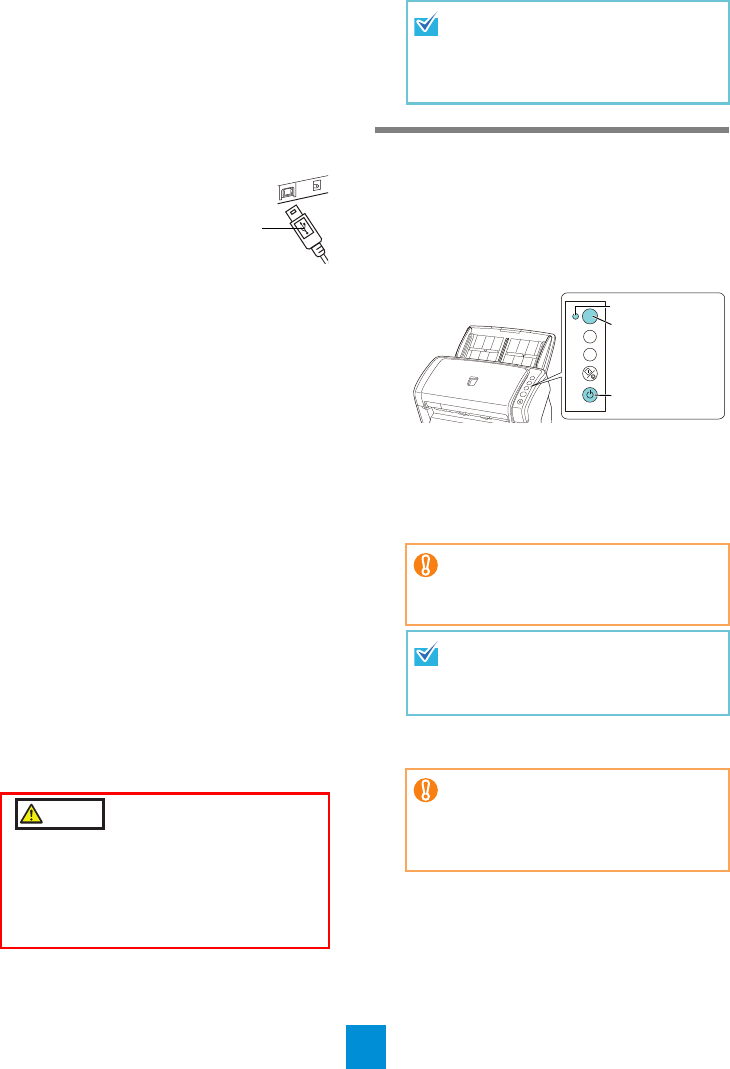
1. Press the [Power] button on the operator
panel.
D The scanner is turned on, and the [Power]
button lights in green.
During initialization, the Function Number
Display changes as follows: "8" J "P" J
"0" J "1". The scanner is ready when "1"
is displayed.
2. Turn on the computer.
D The scanner is automatically detected.
WARNING
Only use the supplied power cable.
To prevent electrical shock or scanner
malfunction, do not perform the following:
zUse a different power cable
zUse the supplied power cable for other
devices
USB mark
When you plug the cable into the
outlet, the [Power] button on the
scanner’s operator panel will flash
once. Note that this is an initial
diagnosis and not a malfunction.
If "1" is not displayed on the Function
Number Display, refer to "Chapter 8
Troubleshooting" in the Operator's
Guide.
When you press the [Power] button,
the LED indicator will flash once.
Note that this is an initial diagnosis
and not a malfunction.
If the [Found New Hardware] dialog
box appears, select [Locate and install
driver software (recommended)], and
follow the instructions on the screen to
install the driver.
Check
Function
Send to
Scan
/Stop
Power
Function
Number
Display
[Power] button
LED indicator