2 Installing the Scanner
13
3) Gently close the Document Cover.
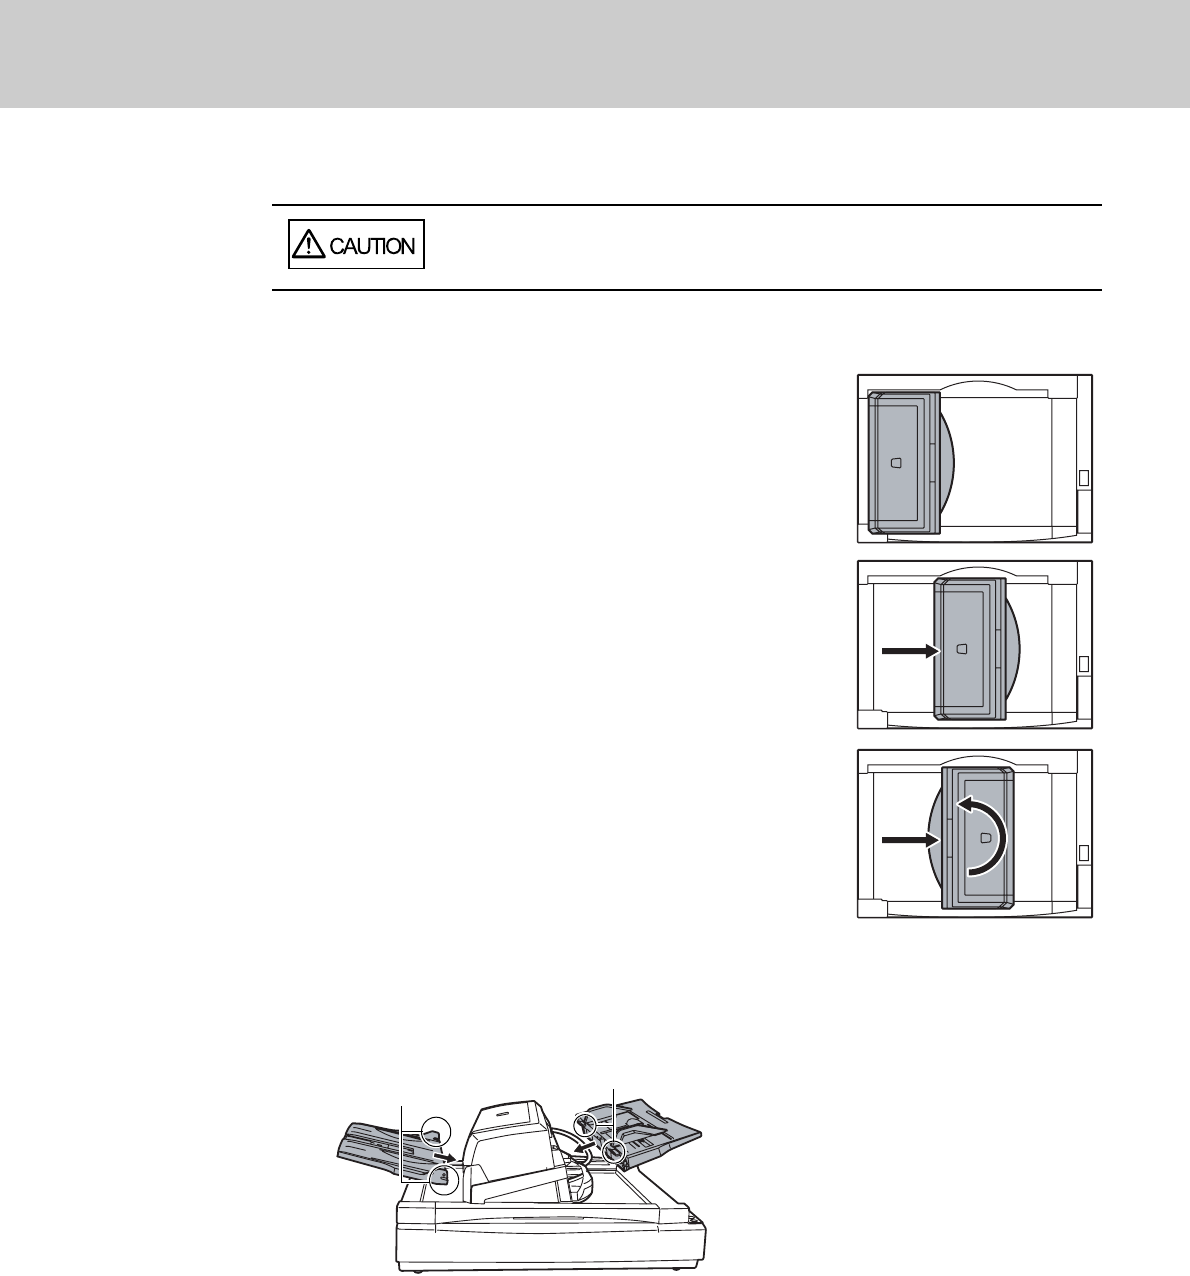
4) Change the position of the ADF.
The ADF can be set to any of the following three positions:
After repositioning the ADF, be sure that the ADF is firmly locked to the new position.
■
Traditional (Factory default)
■ Standard (Space-saving type and for right-handed
operators)
Slide the ADF toward the center of the scanner.
Note the following explanation in this manual is based upon
this standard type of the scanner.
■
Reversed (Space-saving type and for left-handed
operators)
Slide the ADF toward the center of the scanner, and then
rotate it counterclockwise by 180 degree.
4 Attach the Stacker and the ADF Paper Chute to the scanner.
1)
Insert the hooks of the ADF Paper Chute into their corresponding holes on the scanner.
2) Fit the protruding sections of the Stacker into their corresponding slots on the scanner.
• Be careful not to pinch your fingers when moving the ADF.
• Never rotate the ADF by more than 180 degree. Doing so may damage the ADF.
Protruding section
Hook


