13
Installation
3.2 Connecting/Wiring the Digital Gateway to the sc100 Controller
DANGER
The sc100 and certain versions of the sensor are suitable for use in Class 1,
Division 2, Groups A, B, C, D Hazardous Locations . See Control Drawing 58600-78
in the sc100 Controller Manual, Cat. No. 58600-18 for acceptable sensor versions
and installation requirements.
DANGER
Le sc100 et certaines versions du capteur peuvent être utilisés dans des endroits
dangereux de la Classe 1, Division 2, Groupes A, B, C, D. Reportez-vous au schéma
de contrôle 58600-78 du Manuel du contrôleur sc100, Réf. 58600-18 pour connaître
les versions des capteurs admises et les conditions d'installation.
The digital gateway should be wired to the sensor before connecting to the controller.
3.2.1 Connecting the Digital Gateway Sensor in a Non-hazardous Location
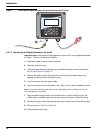
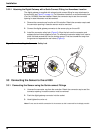
3.2.1.1 Attaching the Digital Gateway with a Quick-connect Fitting in a Non-hazardous Location
Important Note: The standard quick-connect fitting is NOT suitable for Class 1, Division 2
Hazardous Location installations without the connector lock installed, see section 3.2.1 on
page 13 for more information.
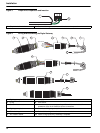
The digital gateway is supplied with a keyed quick-connect fitting for easy attachment
to the controller, see Figure 7. Retain the connector cap to seal the connector opening in
case the sensor must be removed. Optional extension cables may be purchased to extend
the sensor cable length. If the total cable length exceeds 100 m (328 ft), a termination box
must be installed. See Replacement Parts and Accessories on page 37.
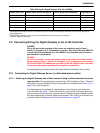
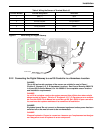
Table 3 Wiring the Digital Gateway (Cat. No. 6120800)
Sensor (wire color) Sensor Signal without Ground Rod Sensor Signal with Ground Rod
1
Digital Gateway
Metal Braid
2
Jumper 2 from J3-1 to J3-3
3
Ref J3-1
White Temp + Temp + J3-2
Red Temp – Temp – J3-3
Blue Ref Solution Ground J3-4
Clear Active/Measuring Active/Measuring J1-5
not used not used not used J1-6
1
Some applications require the use of an external ground rod with the combination electrode. Use this wiring scheme for
these applications.
2
If Metal Braid is “tinned”, cut the tinned area off and twist the wire to insert into connector.
3
Customer-supplied (required)


