39
English
Basic Techniques
This section explains about recording of movies and still images, and also basic settings on
DVD video camera/recorder.
1<>2/
Recording Movie
1
Remove the lens cap, and then point the DVD
video camera/recorder at subject.
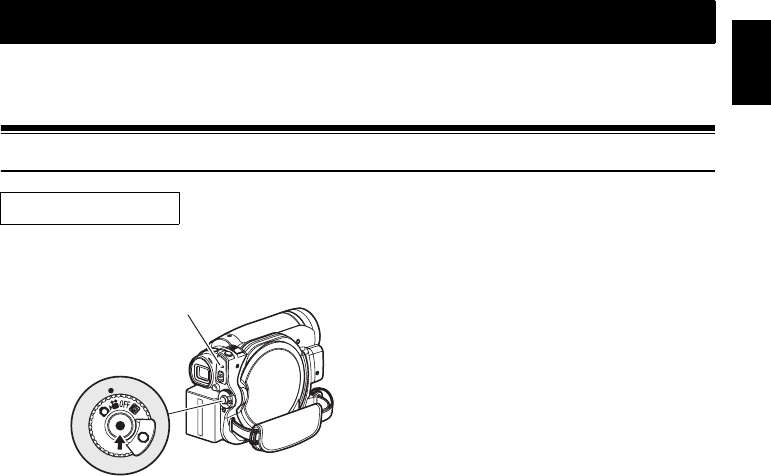
2 Turn the DVD camera/recorder on.
Set the power switch to “O” to turn the DVD
video camera/recorder on.
After the ACCESS/PC indicator goes out,
perform the subsequent operation:
3 Check the subject on the screen (viewfinder
or LCD).
When using the viewfinder, close the LCD
monitor before pulling out the viewfinder.
4 Press the REC button.
The “m” mark in the viewfinder or on the
LCD screen will change to the “n” mark,
and recording will start.
During recording, the recording indicator on
the front of DVD video camera/recorder will
light.
Pressing REC again during recording will set
the DVD video camera/recorder to the
recording pause status.
5 When recording is finished, turn the DVD
video camera/recorder off.
Note:
• See “Troubleshooting” on page 135 when recording
movie is not possible.
• See “Troubleshooting” on page 135 if it takes some
time before recording is possible.
• See “Troubleshooting” on page 135 if the DVD video
camera/recorder does not operate.
• See page 43 for on-screen information display.
• While the ACCESS/PC indicator is lit or blinking, do
not turn the DVD video camera/recorder off, and take
care not to subject it to any vibration: Doing so could
cause an error in the recorded data, which could
make it unplayable (see page 7).
• The minimum recordable time of movie is
approximately 3 seconds.
• See page 33 for setting of Record LED (recording
indicator) On/Off.
• For various functions available during recording, see
“Setting Up Camera Functions” on page 56.
• Hitachi cannot be responsible for video and audio that
cannot be recorded or edited because of any defect.
• The power switch can be changed over even during
recording, but the operation will not be changed.
• It is recommended that you set the LOCK switch to L
(the upper position) to prevent the power switch in the
“O” position from accidentally moving to “N” position.
• Each time the DVD video camera/recorder enters the
recording pause status, the counter display will be
reset to “0:00:00”.
• If, when using a +RW, one-time recording duration is
short or you frequently switch the video quality,
recording may not be possible even when the disc
has remaining space.
Before You Begin
• Insert a recordable disc into this DVD video camera/recorder.
ACCESS/PC
indicator
Pressing REC
once will start
recording;
pressing it once
again will
temporarily stop
recording.


