


11
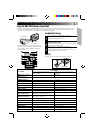
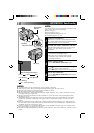
Date/Time Setting
SELECT MODE
1
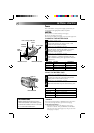
Set the Power switch to “CAMERA”, and the
Shooting Mode selector to “PRESET”.
ACCESS MAIN MENU SCREEN
2
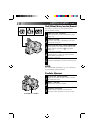
Press MENU.
SELECT FUNCTION
3
Press – to move the highlight bar down to “Date/
Time”, then press NEAR. The Set Date And Time
screen appears.
SET DATE/TIME
4
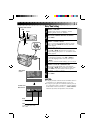
Press FAR or NEAR until the item you want to set
begins blinking, then press + or – to until the correct
setting appears.
•If you decide you want to return the date and time
to the previous settings, press FAR or NEAR to
move the highlight bar to “Cancel”, then press
MENU.
•If you’re satisfied with the settings, go on to step 5.
START CLOCK OPERATION
5
Once you’ve set the month, day, year and time,
press FAR or NEAR until “Set” begins to blink, then
press MENU. The Main Menu screen reappears.
CLOSE MAIN MENU
6
Press MENU.
NOTES:
●
To display the date and time in the viewfinder and on a
connected TV, see “Date/Time Insert” (
੬
pg. 20).
●
If, in step 4, you input an invalid date (FEB 30, JUN 31,
etc.) and perform step 5, “Input Error” appears blinking
at the bottom of the screen. Press +, –, FAR or NEAR to
make the day blink, and input the correct number.
Tele Macro OFF
Gain Up AGC
Color Filter NOR.
Tape Length T30
Title
Sub Menu
Shift Zoom OFF
Set
Cancel
JAN 1.00 AM 12:00
Date/Time
Main Menu
Screen
Set Time and
Date Screen
Date
Month/Day/Year
Time
12-hour indication with
AM or PM
–
+
FAR
NEAR
Shooting mode selector
MENU