


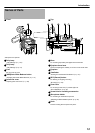

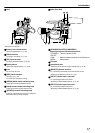
Names of Parts (Continued)
o
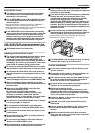
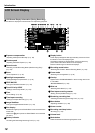
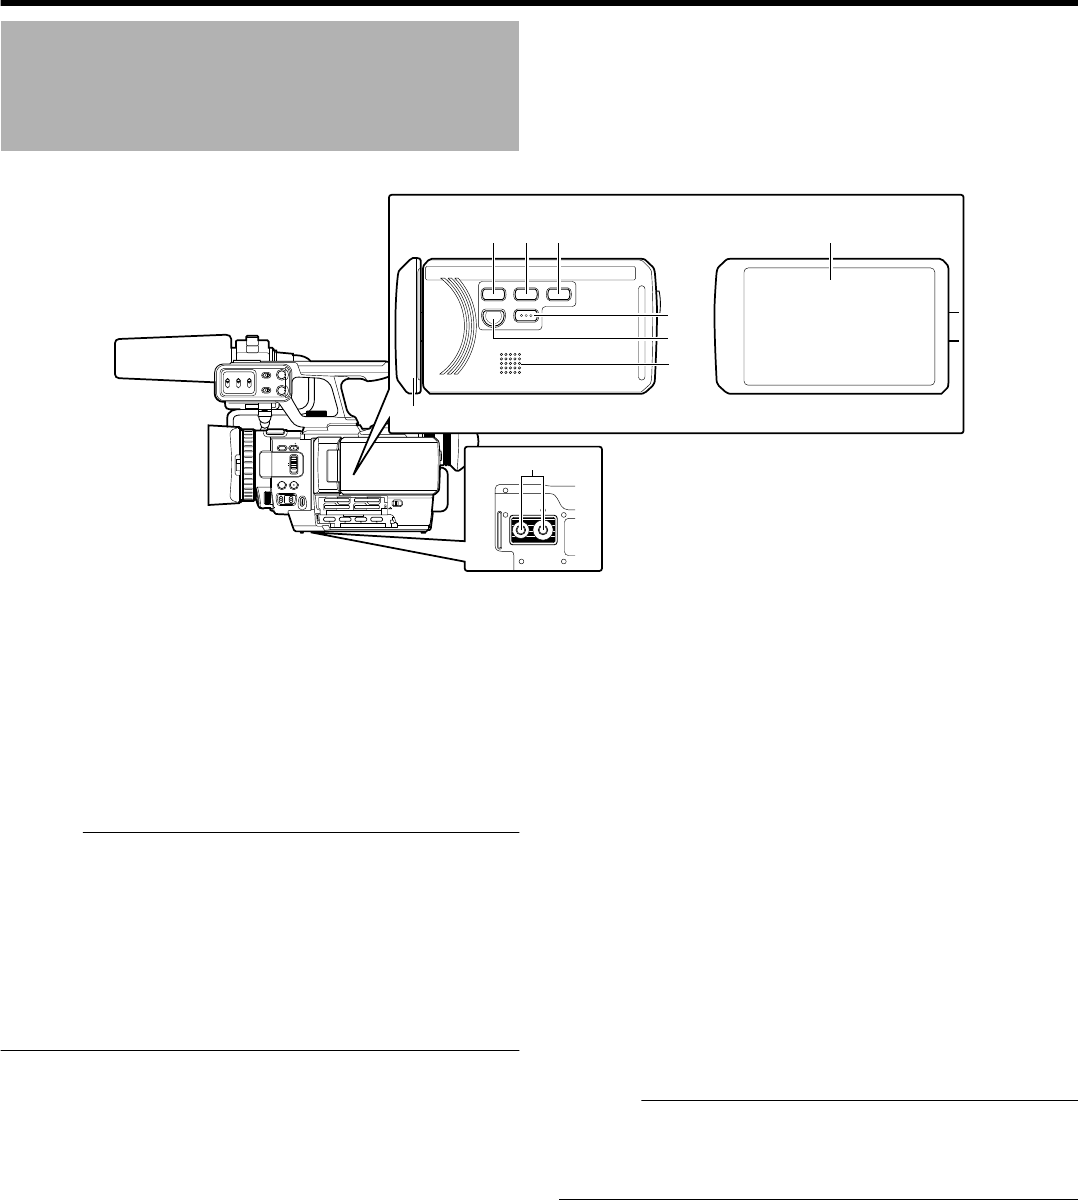
LCD Monitor Unit
.
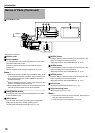
CH-2 INPUT
CH-1
3
4
5
2
1
2
3
0
CH-2
AUDIO INPUT
AUTO M ANUAL
AUTO MANUAL
FULL AUTO
DOOR LOCK
SD
A E
SET
GAIN
ADJ.
IRISWHT. BAL
SHUTTER
A F
M F
4321
C
A
D
B
AUDIO
SELECT
INPUT1
INPUT2
- LINE -
- MIC -
MIC+48V
INPUT1
INPUT2
L-
M-
H-
B -
A -
PRST
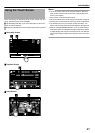
CAM/MEDIA
INFO
USER2 USER3USER1
C
D
B
A
GFEH
I
* Microphone is optional.
A Monitor cover
B Built-in speaker
You can adjust the volume level using the [ADJ.] knob on the
same side as the LCD monitor.
Audio from the built-in speaker can be monitored using a
headphone.
“Monitoring Audio Sound Using a Headphone” (A p. 46)
Memo :
0
The built-in speaker is usable only in the Media mode. Audio
is not output from the built-in speaker during Camera mode.
0
Audio level in the Camera mode and Media mode can be
adjusted separately.
0
When in the Media mode, the volume of the headphone and
speaker are adjusted at the same time.
0
When the headphone connector is not connected to this unit,
the audio is always output from the built-in speaker.
C [CAM]/[MEDIA] button
Pressing the button each time switches between the Camera
mode and Media mode.
D [INFO] button
You can check the remaining recording time on the SDHC/
SDXC card as well as the remaining battery power.
“Checking the Remaining Recording Time” (A p. 44)
E [USER1] button
A specific feature in the menu setting can be assigned to this
button according to the user’s preference.
“Assigning Functions to the USER Buttons” (A p. 27)
F [USER2] button
A specific feature in the menu setting can be assigned to this
button according to the user’s preference.
“Assigning Functions to the USER Buttons” (A p. 27)
G [USER3] button
A specific feature in the menu setting can be assigned to this
button according to the user’s preference.
“Assigning Functions to the USER Buttons” (A p. 27)
H LCD monitor
“Viewing the Viewfinder/LCD Monitor” (A p. 31)
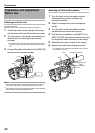
I Tripod mounting holes
“Attaching the Tripod” (A p. 23)
Memo :
0
To prevent the camera recorder from falling, attach securely
using the rotation prevention hole.
0
Use screws with a screw length 5 mm or below.
Introduction
16