


47
EN
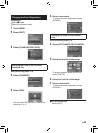
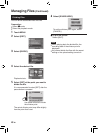
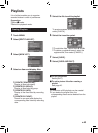
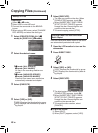
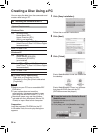
5 Select the desired menu.
•
[COPY ALL]/[MOVE ALL]:
Select this to transfer all files in the
recording medium.
When the size of all files in the HDD is
larger than the free space of the microSD
card, only the files that can be contained
in the free space will be copied.
•
[SELECT AND COPY]/[SELECT AND
MOVE]:
Select when you want to transfer the
selected files.
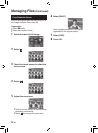
1) Select the desired file. To select other
files, repeat this process.
2) Select [EXEC].
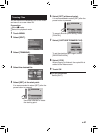
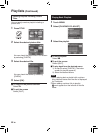
6 Select [YES].
File transfer starts. When [COPYING
COMPLETED]/[MOVING COMPLETED]
appears, touch OK.
To quit the screen
Select [QUIT].
To stop the file transfer
1) Select [STOP].
2) When [QUIT?] appears, select [YES].
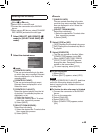
Using a BD/DVD Burner
The files in the camcorder can be backed up to
a disc using a BD/DVD burner.
•
Use one of the following methods to view
the disc. (If you try to play back the disc with
incompatible player, the disc may not be ejected.)
-
Playback the disc using the camcorder. (Z p. 50)
- Playback the disc using a BD/DVD burner.*
- Playback on a PC.*
- Playback the disc using a BD/DVD player
that supports BD-MV and AVCHD.*
*
The DVD must first be finalized on the camcorder.
•
Other than the created BD/DVD using a
BD/DVD burner cannot be played.
•
When connecting a DVD burner (CU-VD50)
to a TV, you can play back the created disc
without using the camcorder. When playing
back disconnect the USB cable.
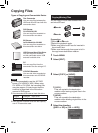
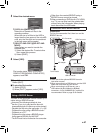
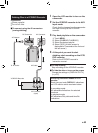
Connection with a BD/DVD Burner
Preparation:
Turn on the camcorder first, then turn on the
BD/DVD burner.
NOTE
•
Refer also to the optional BD/DVD burner’s
instruction manual.
•
When connecting to a DVD burner, use the USB
cable that came with the DVD burner.
•
When connecting to a BD burner, use a
USB cable with Mini-A(Male) to B(Male)
connectors. JVC’s QAM0852-001 (optional) is
recommended. Refer to page 58 for details.
DC Connector
USB Connector
AC Adapter
To AC Outlet
USB Cable
BD/DVD Burner
USB Connector