


48 EN
PLAYBACK
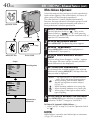
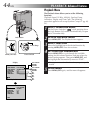
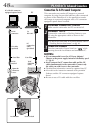
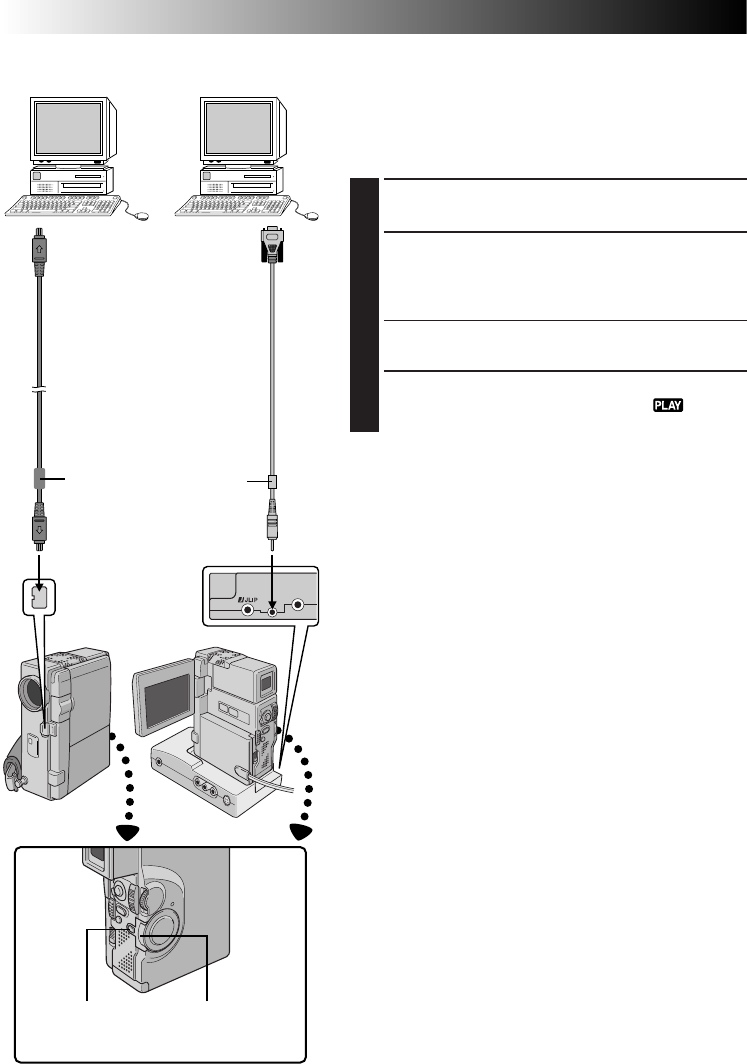
Advanced Connections
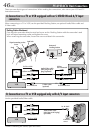
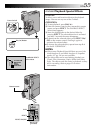
Connection To A Personal Computer
This camcorder can transfer still images to a personal
computer by using the provided software when connected
as shown in the illustration. It is also possible to transfer
still images to a personal computer with a DV connector-
equipped capture board installed.
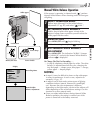
1
CONFIRM POWER-OFF STATUS
Make sure the camcorder and PC are turned off.
2
CONNECT TO PC
Connect the camcorder or Docking Station to your
PC using the appropriate cable as shown in the
illustration.
•To attach the camcorder to Docking Station, refer to
“Docking Station Attachment” on pg. 46.
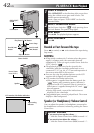
3
TURN ON POWER
Turn the camcorder’s Power Switch to “ ” while
pressing down the Lock Button and turn on the PC.
NOTES:
●
It is recommended to use the AC Power Adapter/
Charger as the power supply instead of the battery pack
(
੬
pg. 9).
●
Never connect the PC connection cable and the DV
cable simultaneously to the camcorder. Connect only
the cable you wish to use to the camcorder.
●
The date/time information cannot be captured into PC.
●
Also refer to the instruction manuals of the provided
Software and the DV connector-equipped capture
board.
●
Be sure to use a DV cable with the core filter.
To PC
(DIGITAL
STILL)
To
RS-232C
DV cable
(optional)
To DV
connector
PC with DV connector-
equipped capture board
Open the
connector
cover.
PC
Core filter
PC
connection
cable
(provided)
To DV
IN/OUT
Power Switch
Lock Button
Core filter